Jira (with Xray and Zephyr support)#
Jira is a powerful work management tool for all kinds of use cases, from requirements and test case management to agile software development.
Zebrunner supports integration with both Cloud and Server/DC Jira distributions.
For Automation Reporting distribution of Zebrunner, this integration allows users to:
- Link issues to failed automated tests
- View history of issues, linked to a particular test
- Automatically link not closed issues to failed tests based on history of failure reasons
- Preview issue linked to a test directly in Zebrunner
- Link Xray and Zephyr test cases to automated tests (for more information about this functionality, refer to the documentation of your automation framework)
- Track test case executions in Jira
- Preview Xray and Zephyr test cases attached to an automated test
For Test Case Management distribution of Zebrunner, this integration allows users to:
- Link issues to test case executions, allowing to track discrepancy in expected behavior
- View history of issues, linked to executions of a particular test case
- Link issues as requirements to test cases
- View issue linked to a test case or a test case execution directly from Zebrunner
- Use Jira issues as requirements to generate missing test cases with AI
- Install Zebrunner for Jira app from Atlassian Marketplace to their Jira workspaces. More info about the app's functionality can be found here
Jira Cloud#
Obtaining API token#
- Log in to your Atlassian account and go to API tokens management view of account Security section
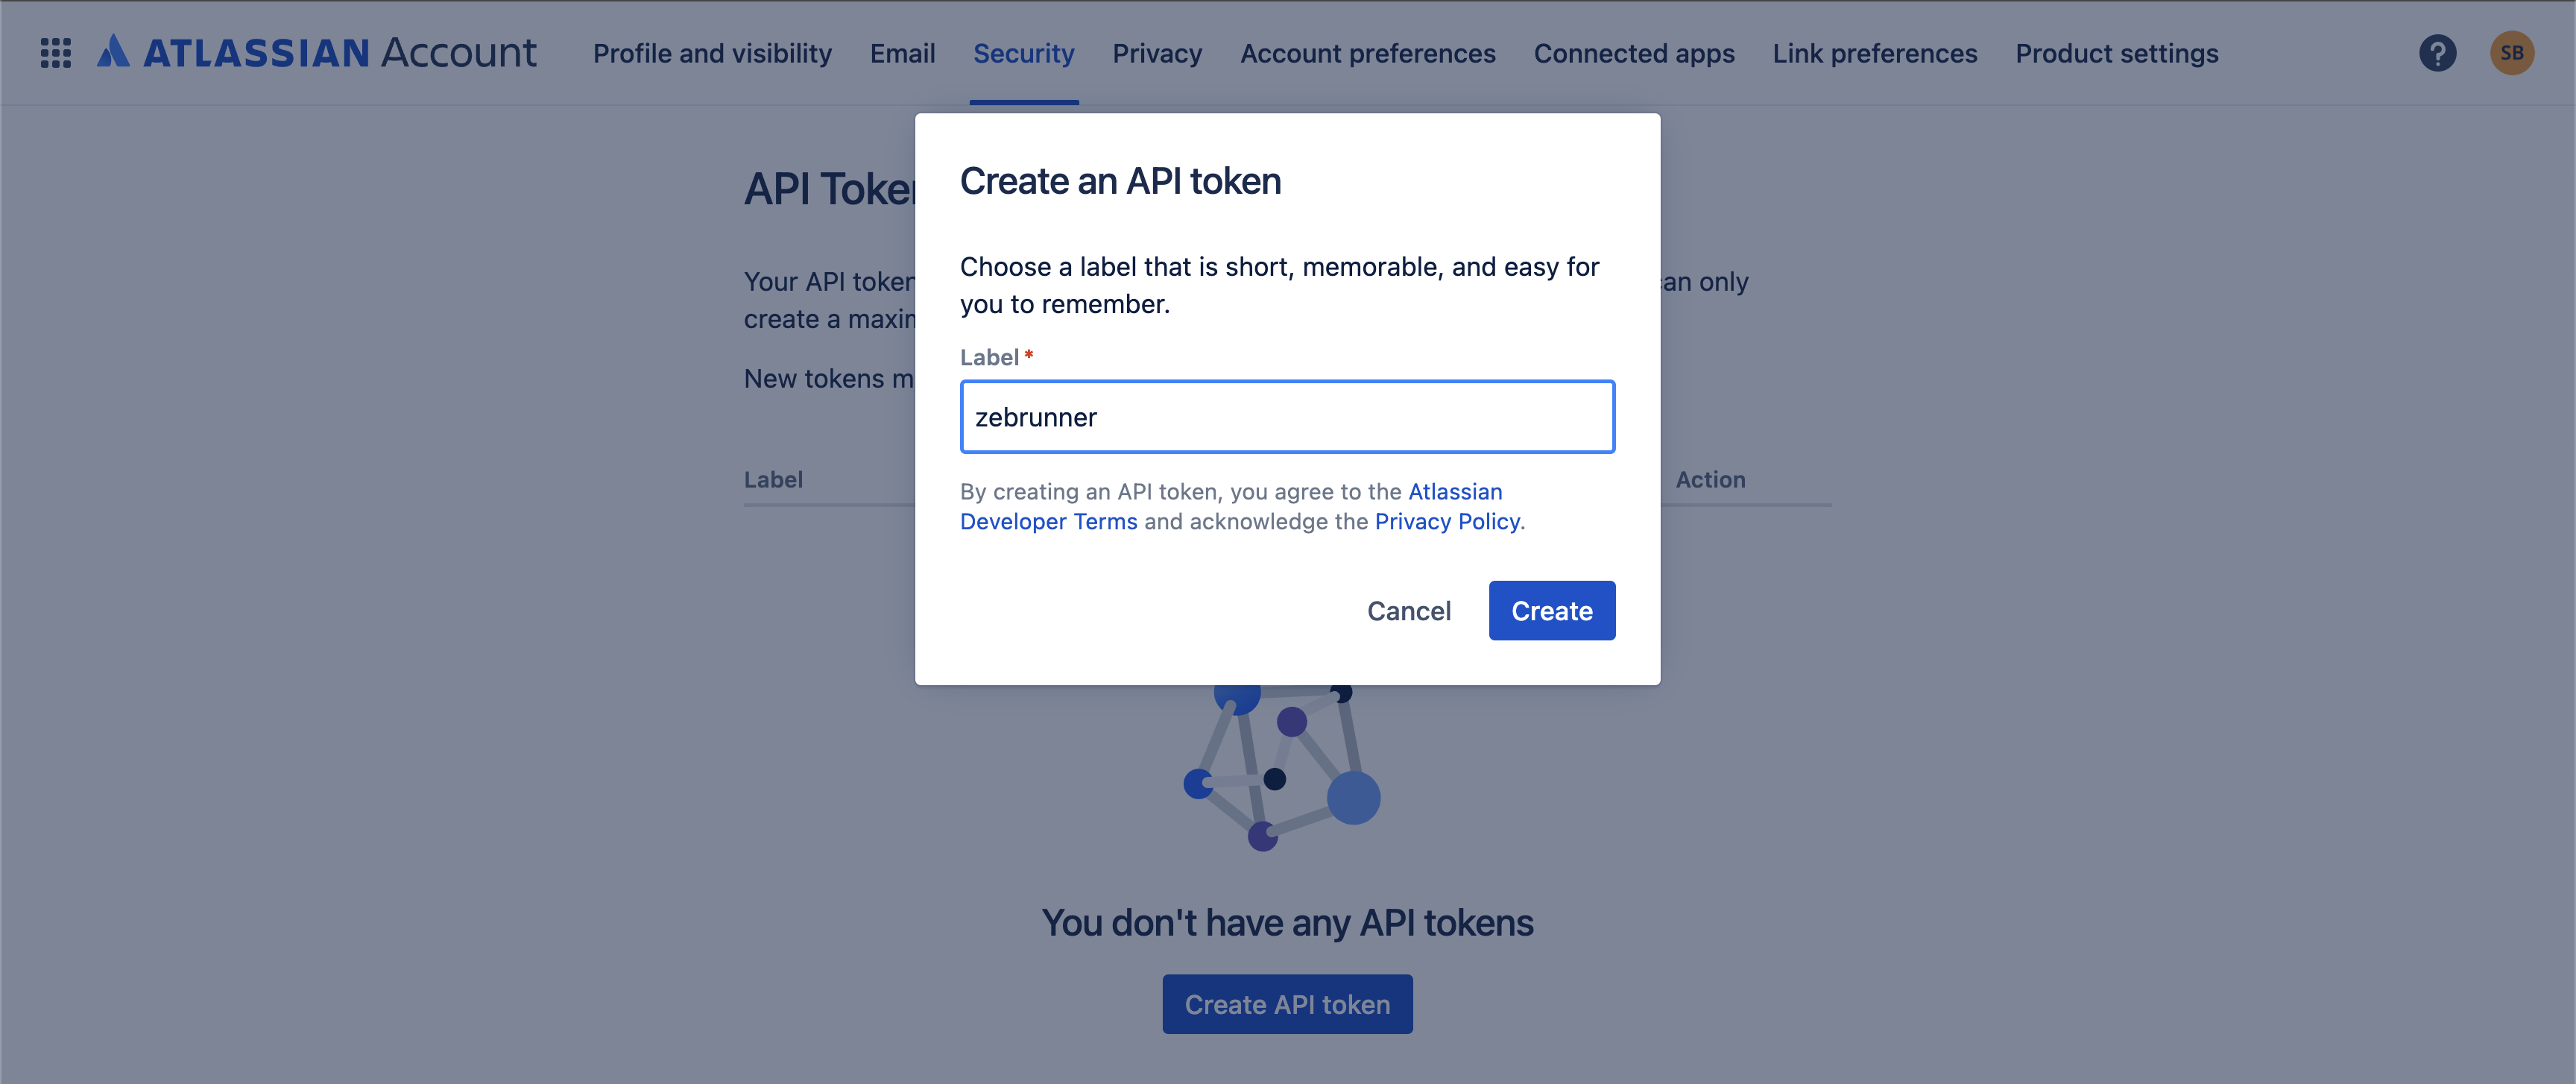
- Click the Create API token button
- Give the token a label (e.g.
zebrunner) and press the Create button - Copy the generated token
Note
Zebrunner will perform requests to Jira API on behalf of the user, whose credentials are specified for the integration. Make sure that user has sufficient read permissions within Jira workspace and project(s) for integration to work correctly.
Configuring integration#
The following steps need to be performed to add an integration with Cloud distribution of Jira:
- Navigate to Setting → Integrations → Jira
- Click the Integration button
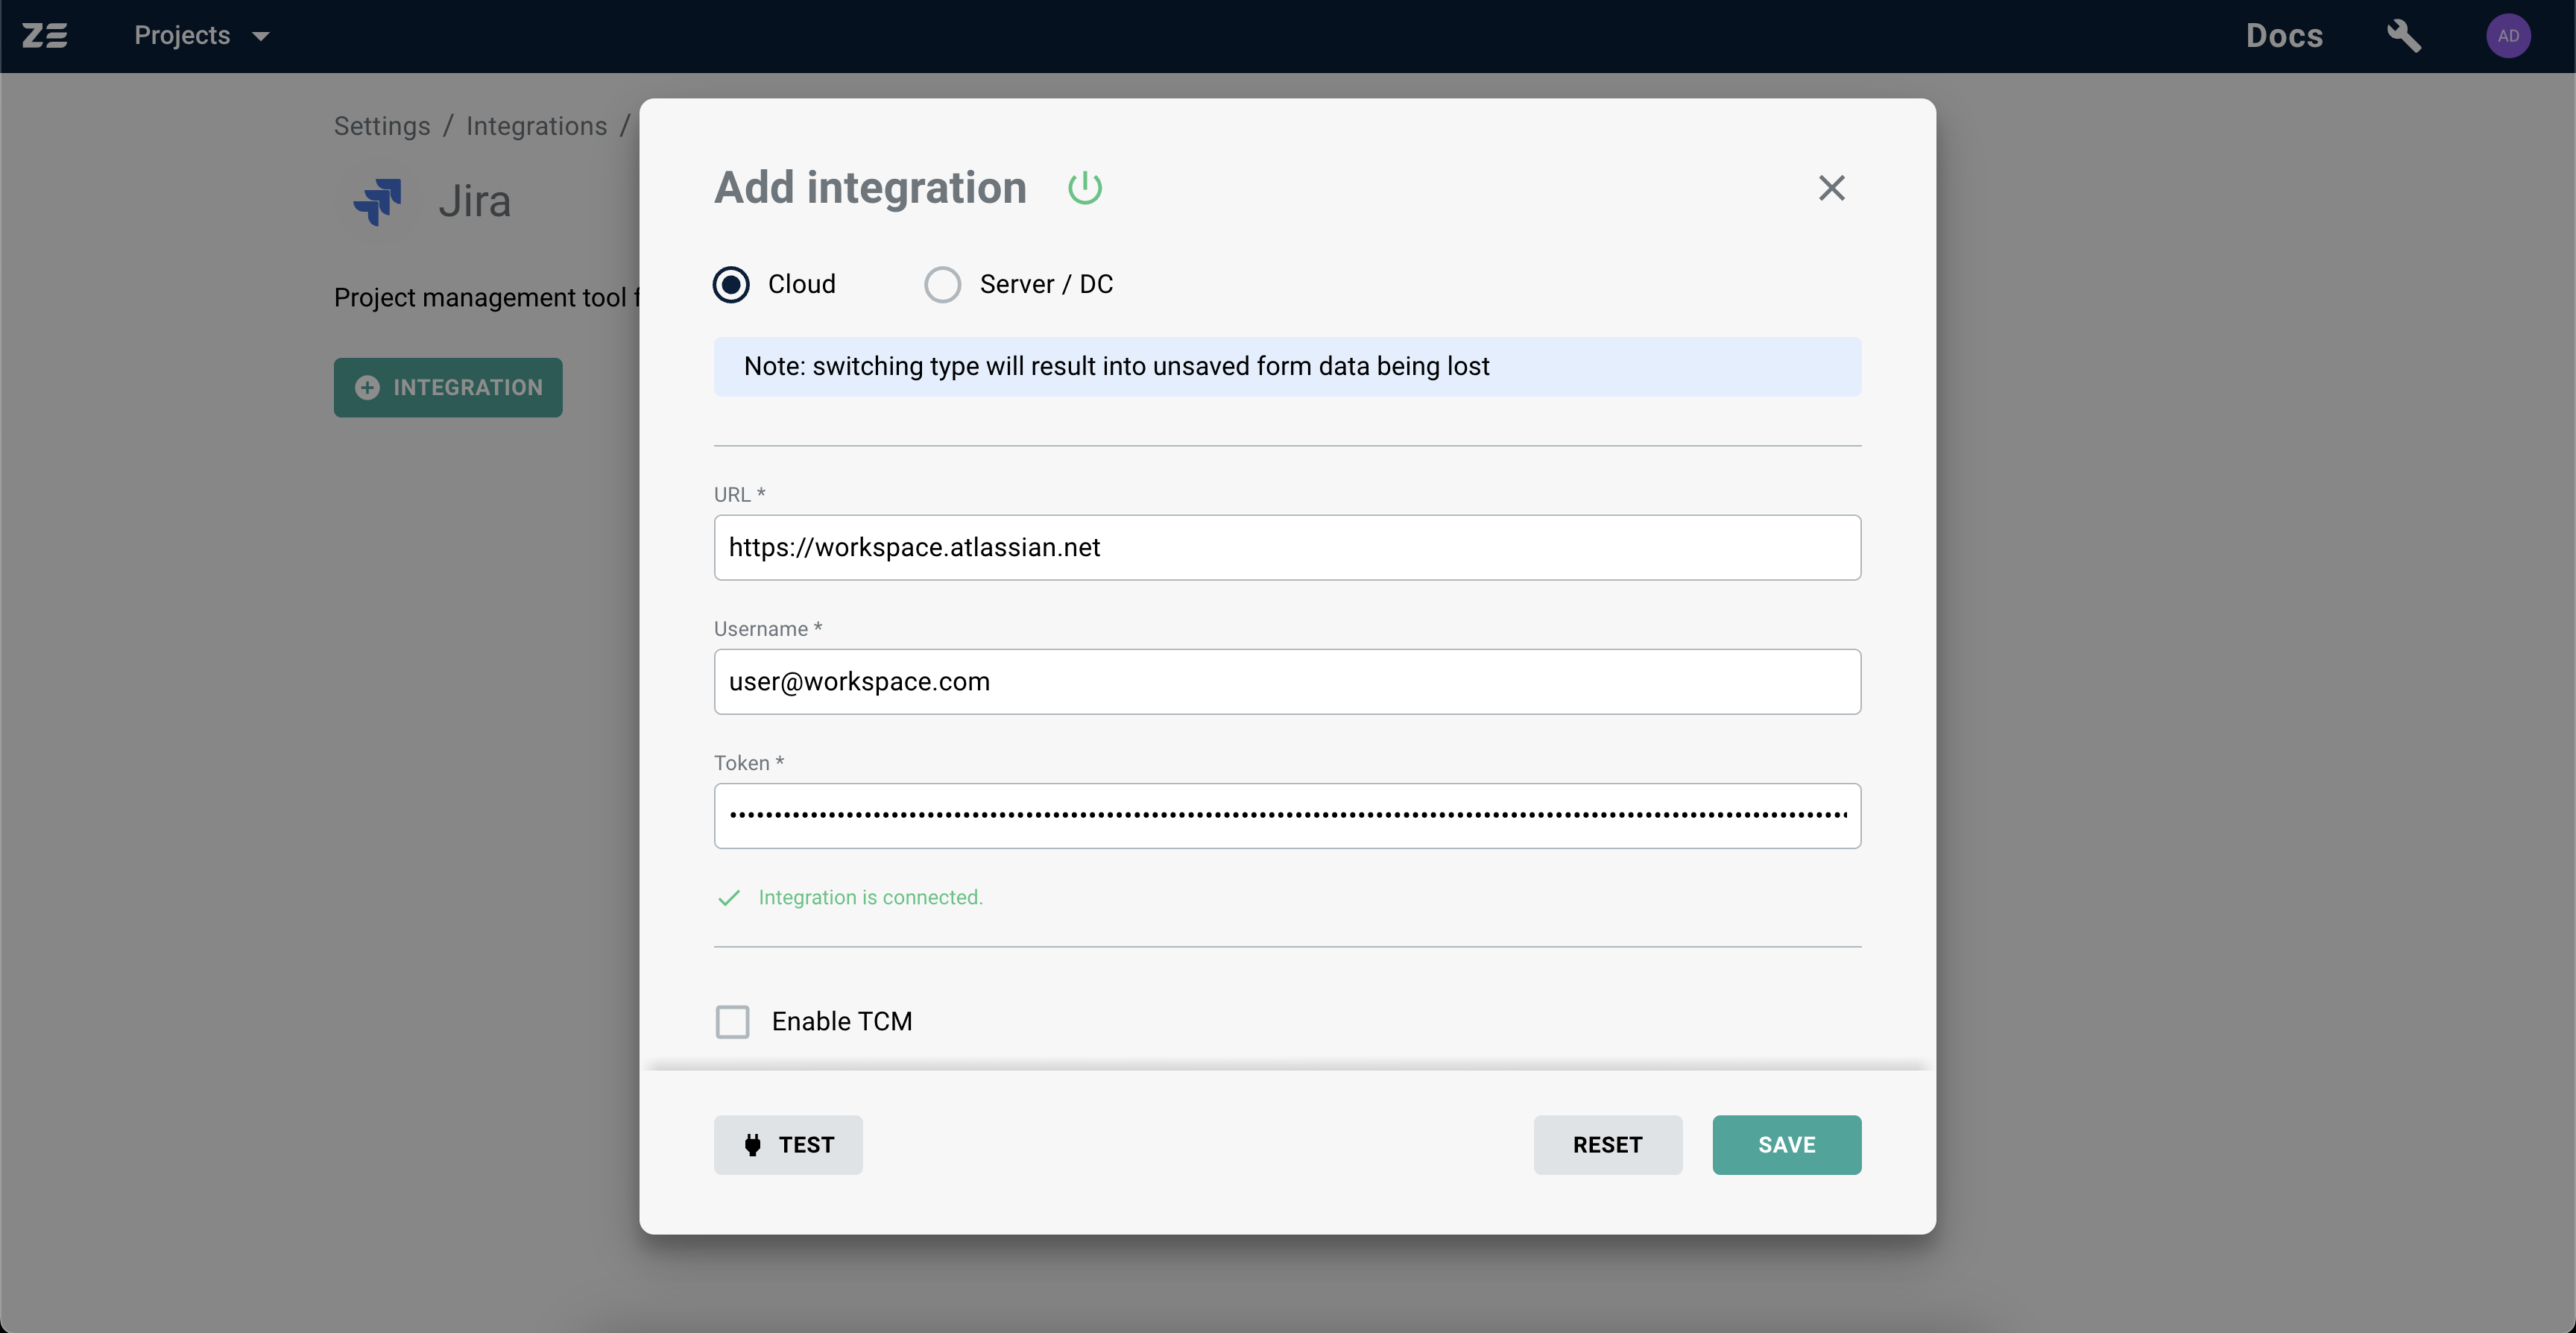
- Select Cloud as the Jira type, enter your Jira hostname, username (or email) and API token
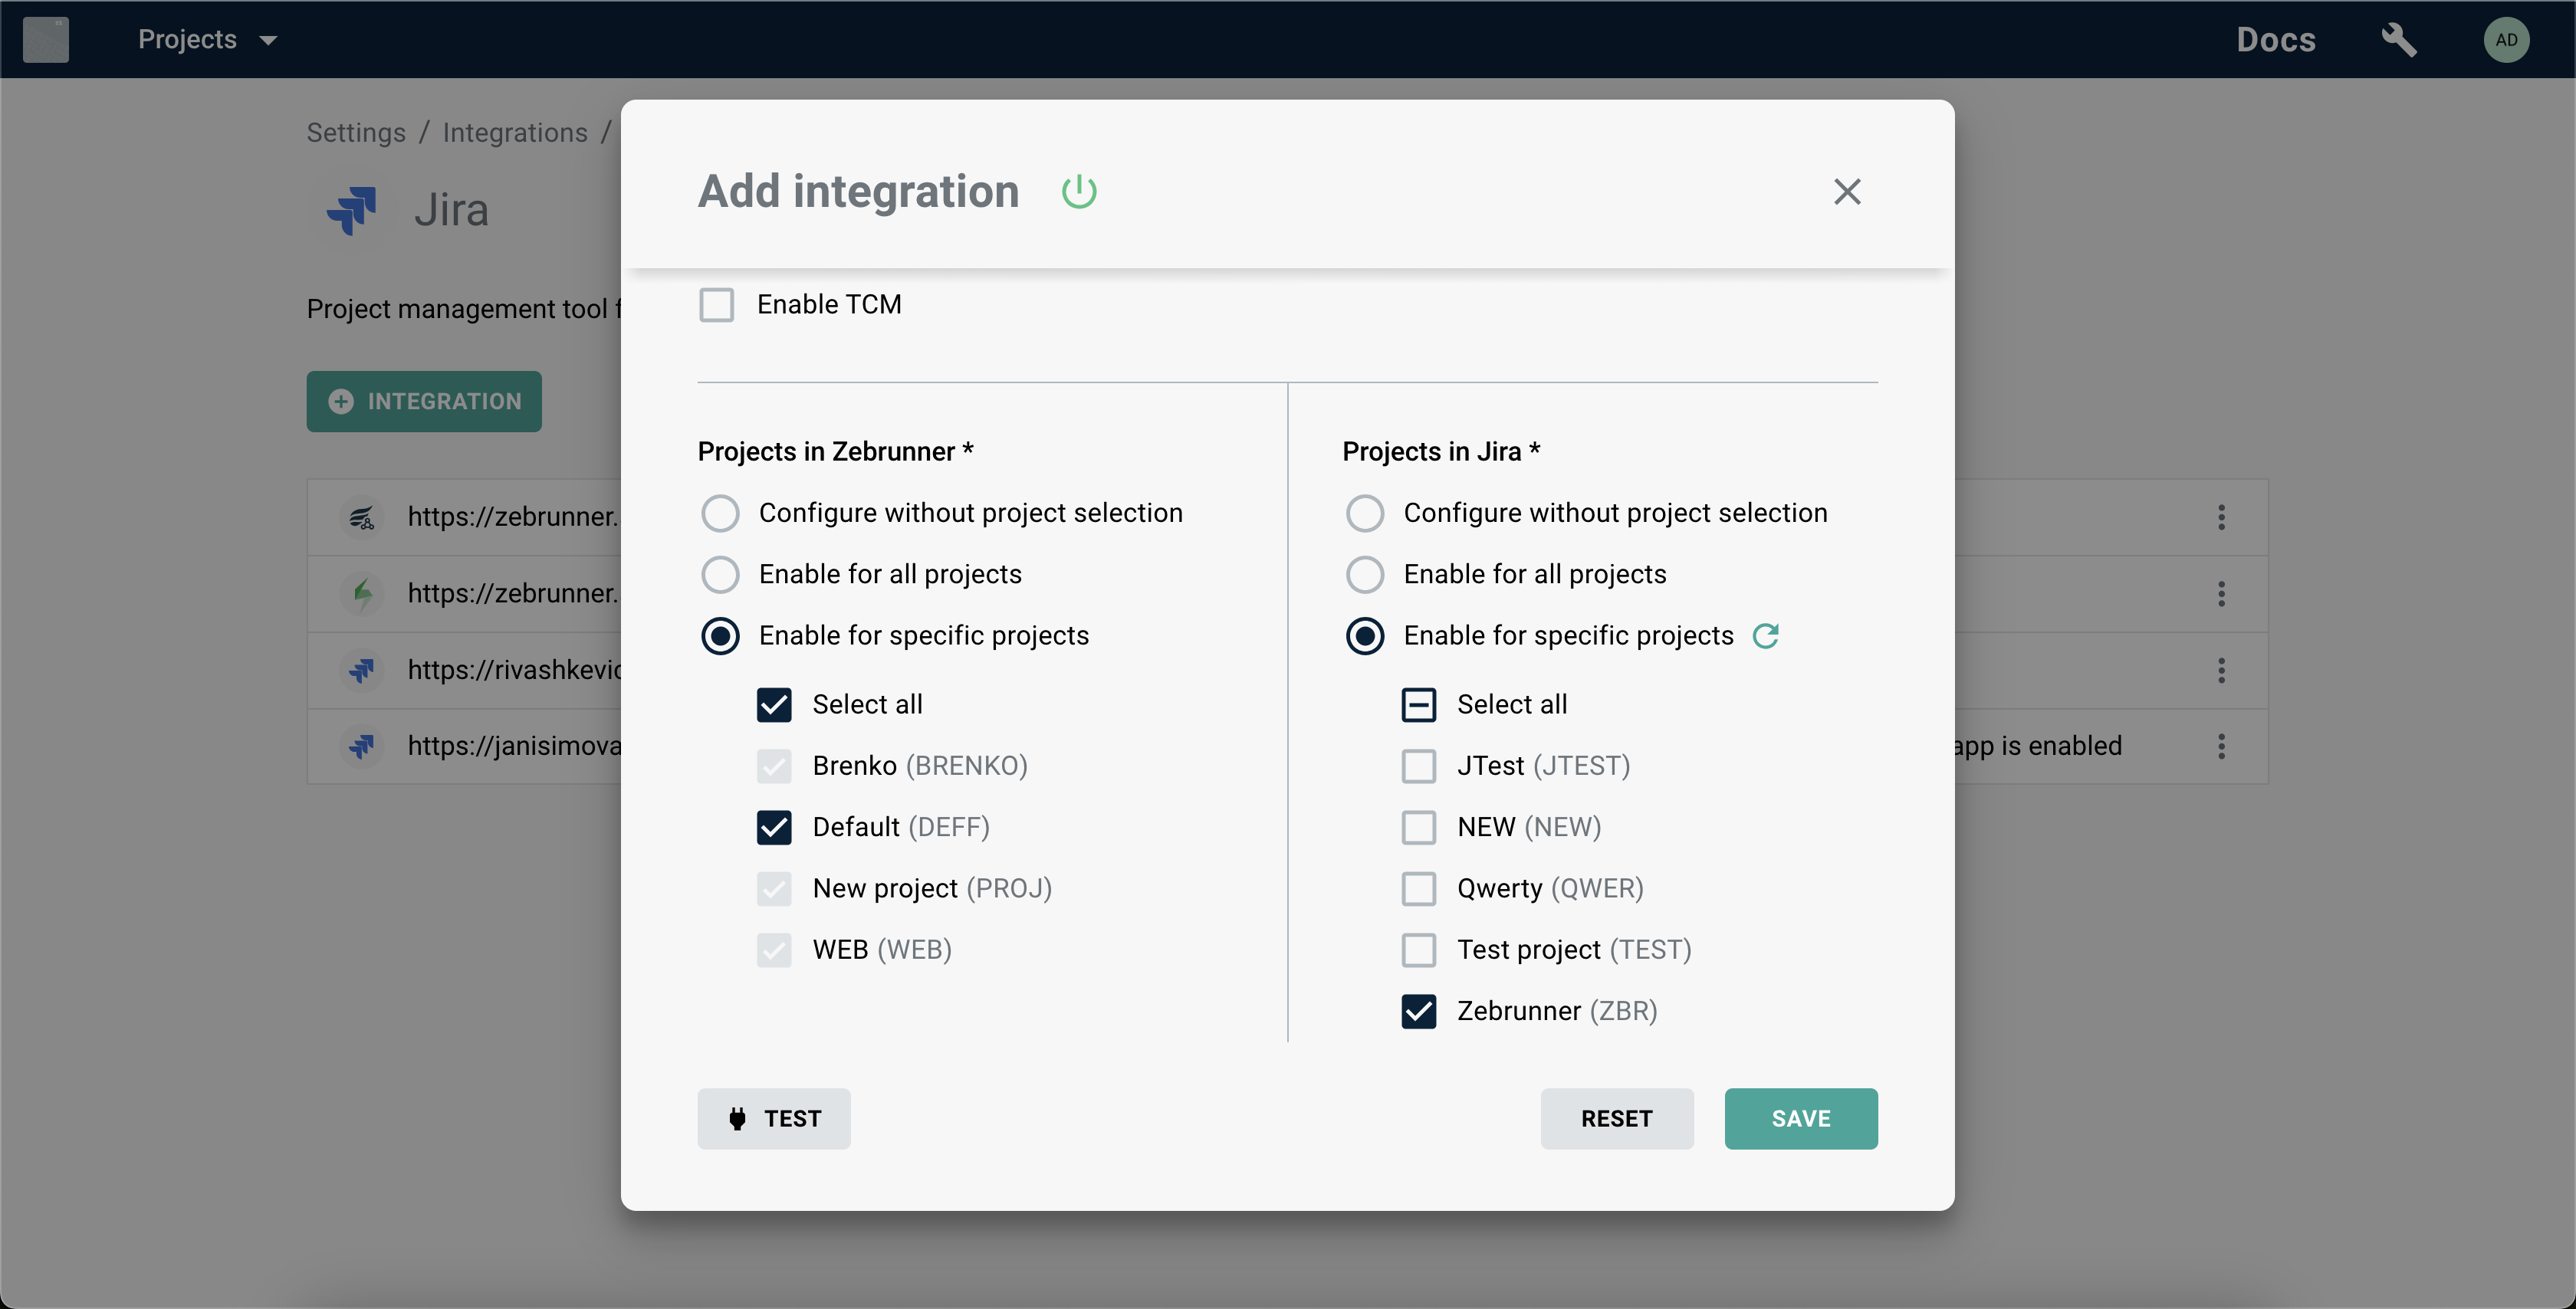
- Select the Zebrunner projects and Jira projects to add the integration to. For more information about selecting Zebrunner projects, refer to the Selecting projects documentation. For more information about selecting Jira projects, refer to the Selecting Jira projects section
- (optional) Click the Test button to check connectivity
- Click the Save button
Note
You can configure multiple integrations for the same Jira workspace with different selected projects. This way you can limit the visibility of data between Zebrunner and Jira.
Selecting Jira projects#
Info
Jira projects selection is only available for Jira Cloud.
As well as for the Zebrunner projects, when creating or editing a Jira integration, you can specify a list of Jira projects in which the integration will be enabled. Unlike the Zebrunner projects selection, you can choose any of the following options for multiple coexisting integrations for the same Jira workspace:
- Configure without project selection
The integration will not be associated with any Jira project. All the attempts of searching or linking issues will give no results.
- Enable for all projects
The integration will be enabled for all current and future Jira projects.
- Enable for specific projects
The integration will be enabled only for the selected projects.
Optional: configuring Xray#
If you are using Xray Jira plugin for test case management, it is possible to connect it to Zebrunner by completing the steps below.
Note
It is assumed that you already have Jira configured as described above.
Obtaining Client Id and Client Secret#
- Log in to your Jira workspace
-
Go to Apps in the header and select Manage your apps section in the dropdown
Note: if you don't see Manage apps section, you probably don't have permissions. In this case, contact your Jira administrator.
-
In the left sidebar, find Xray section and click on API Keys
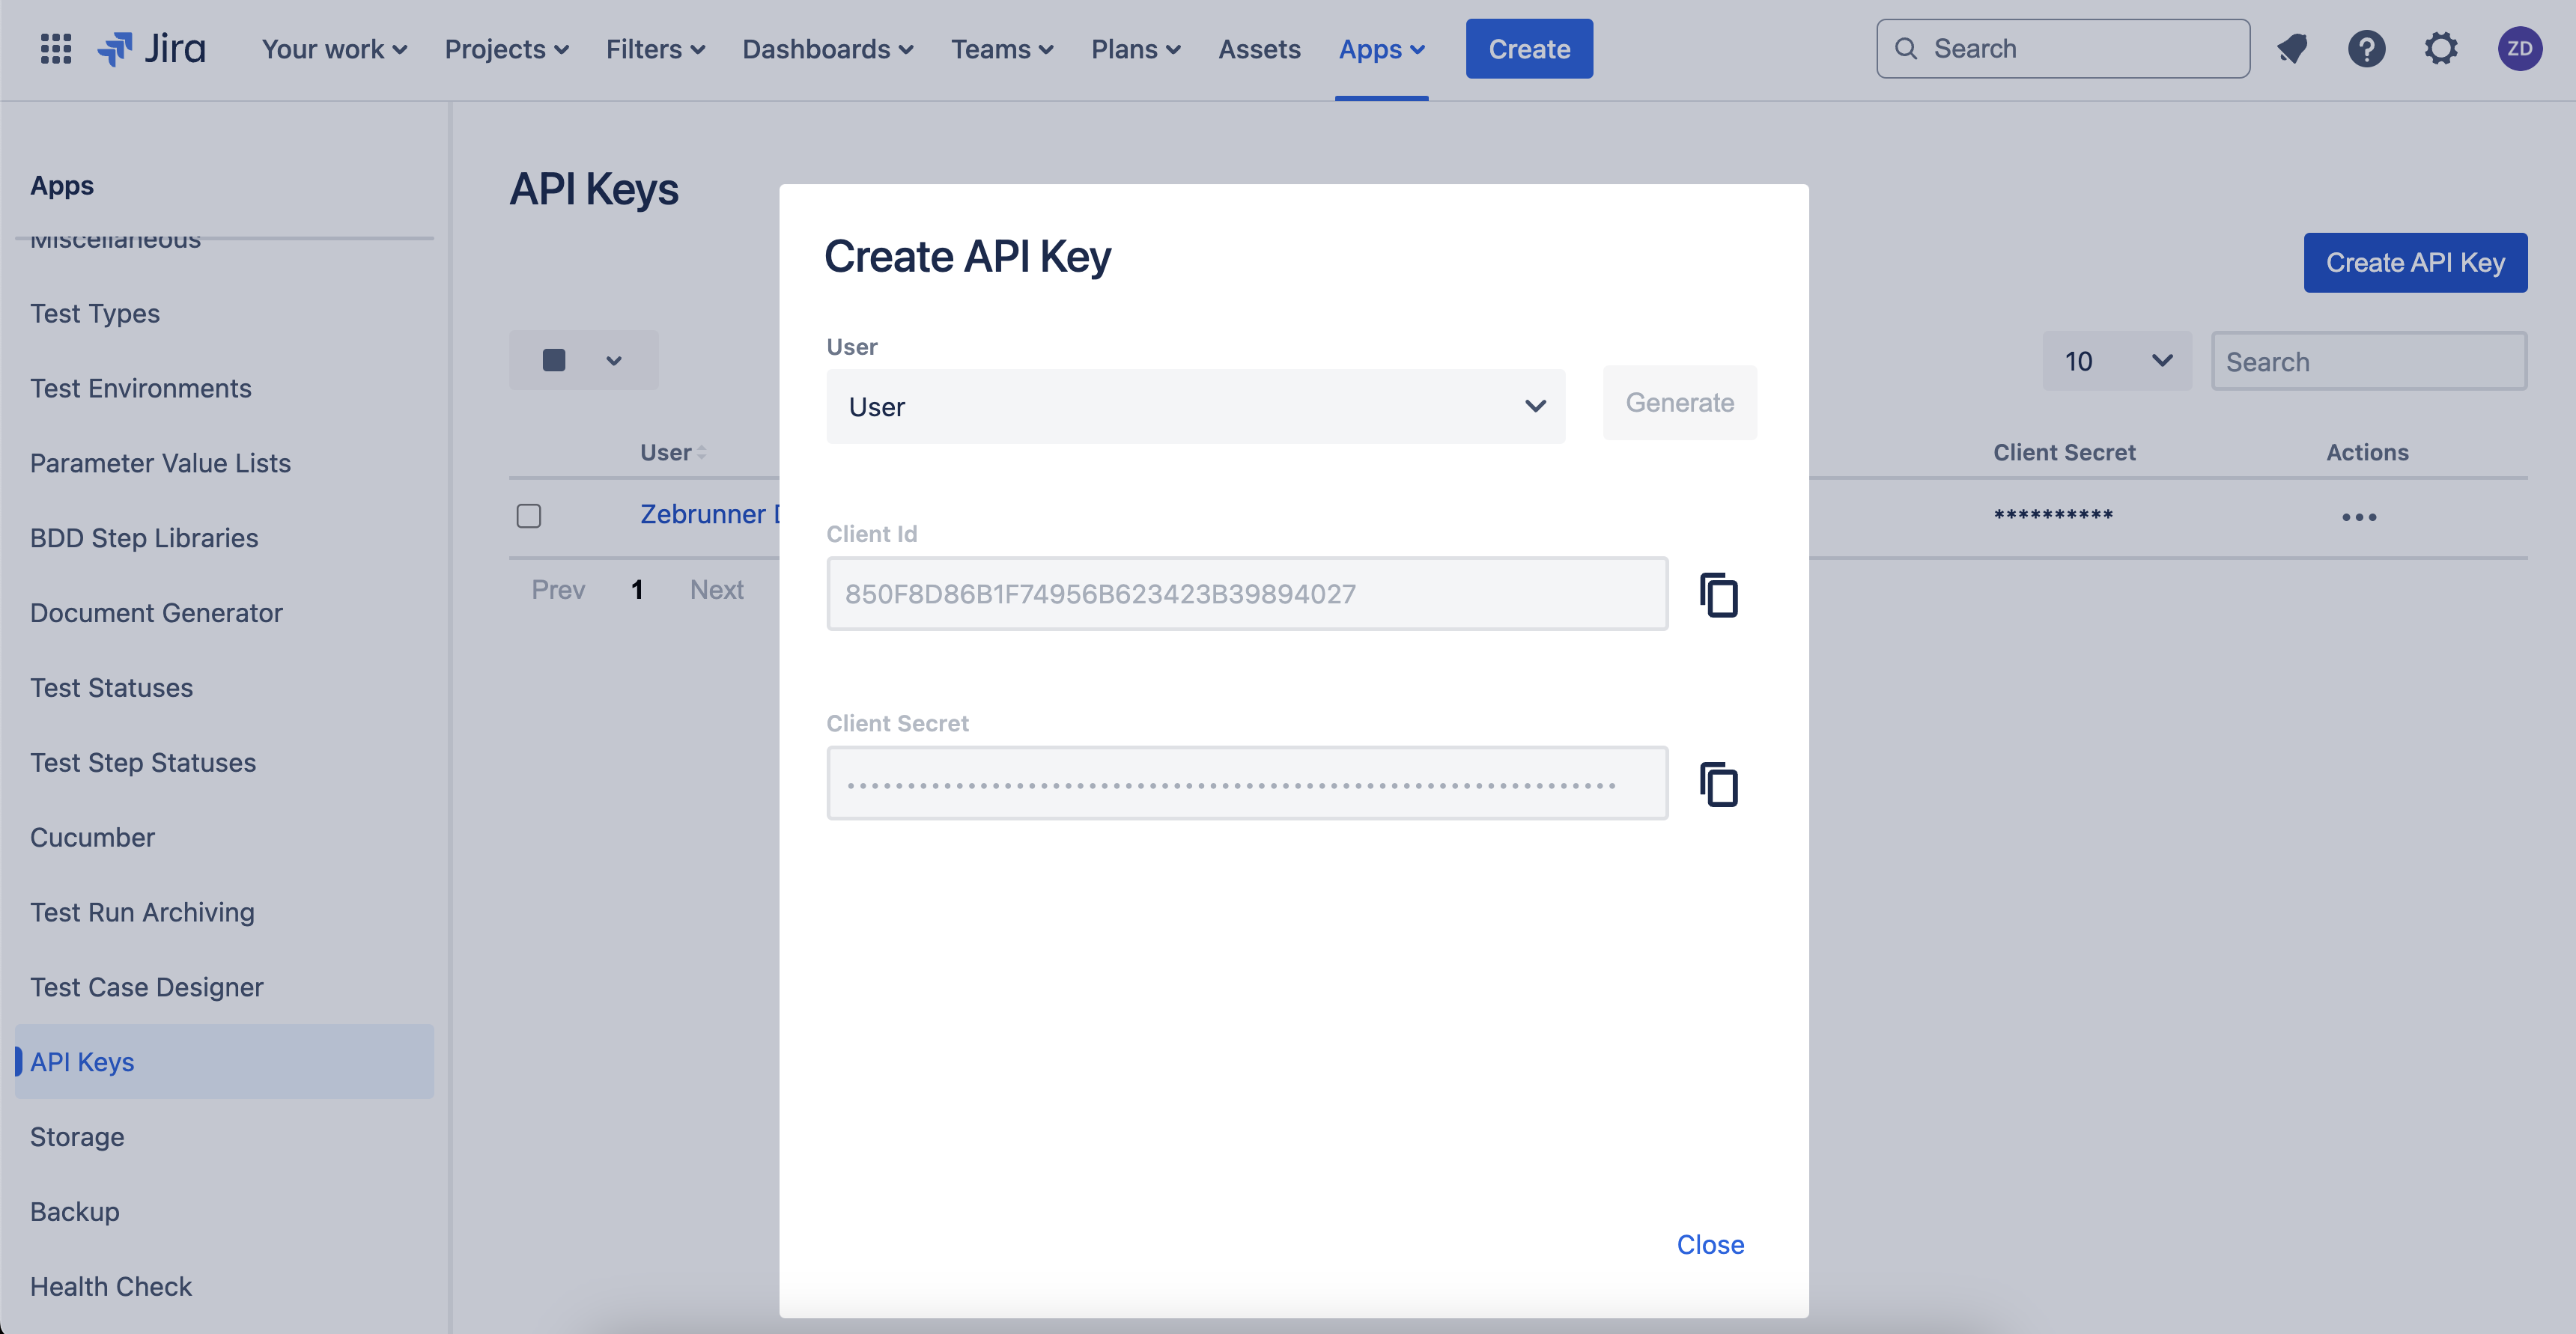
- Press the Create API Key button
- In the pop-up, pick a user for whom the key will be generated and press the Generate
- Copy the generated Client Id and Client Secret
Configuring Xray plugin for Jira integration#
- Either click button for an existing Jira integration or continue creating a new one
- Tick the Enable TCM checkbox and select Xray from the dropdown menu
- Enter
https://xray.cloud.getxray.appas host (regardless of your Jira host), Client Id and Client Secret - Click the Save button
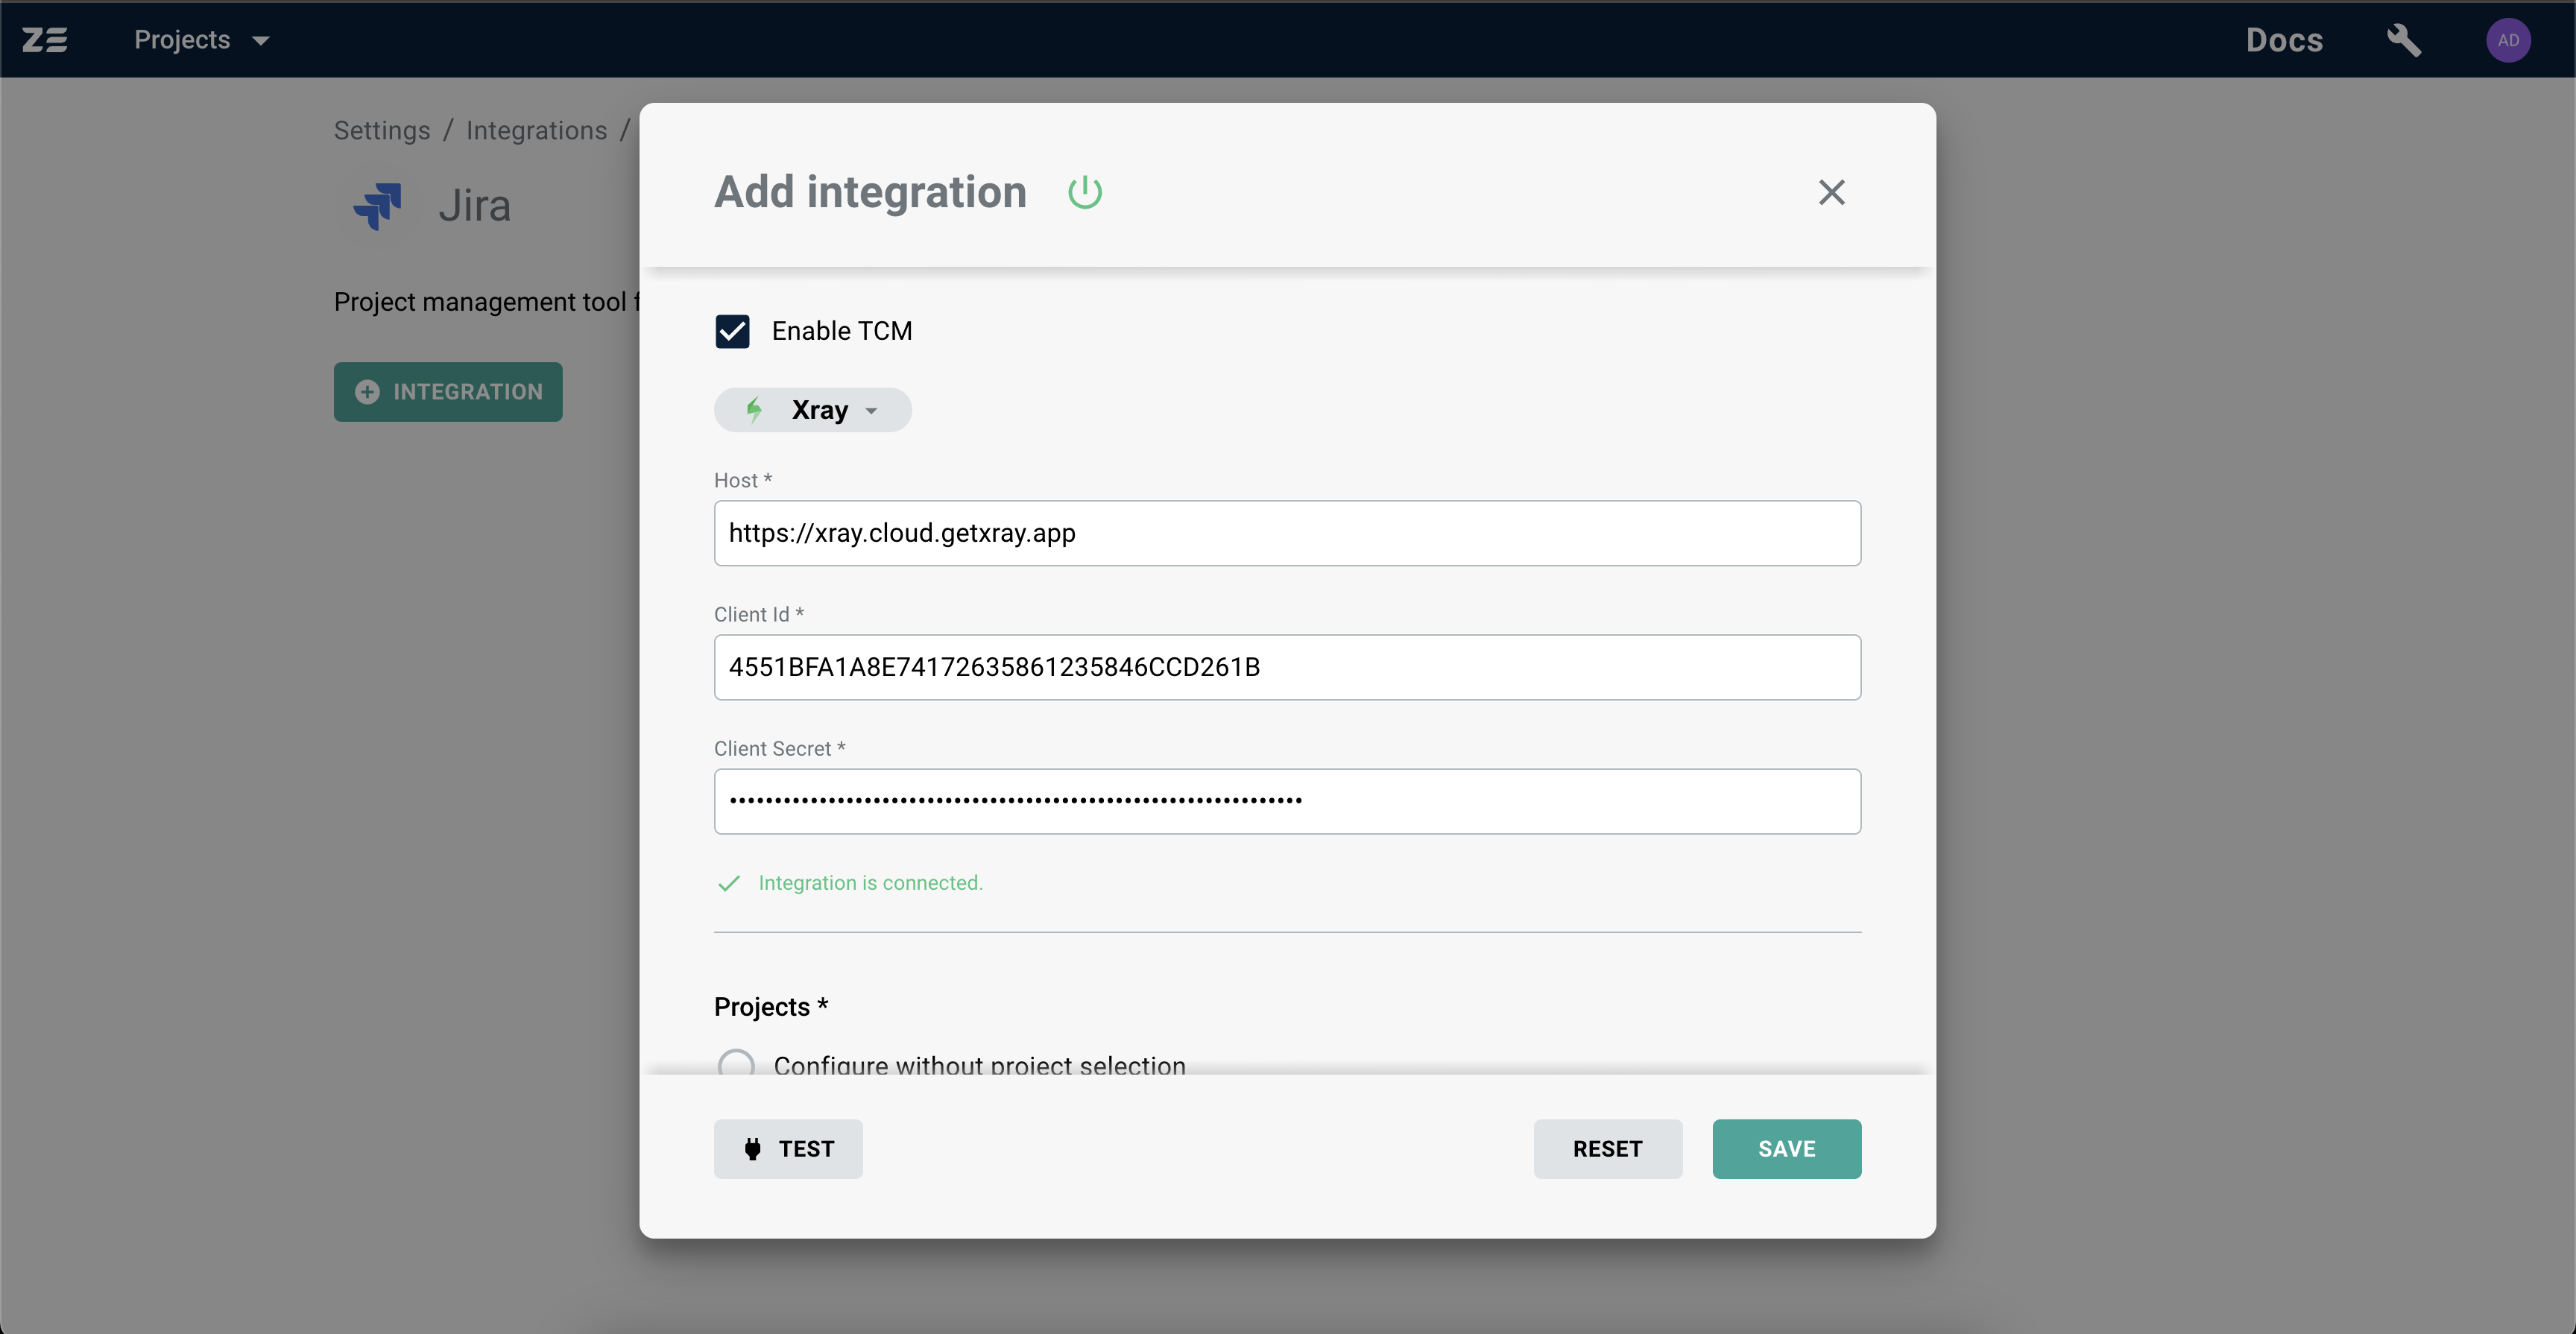
Integration is now configured. The Test button now checks connection with both Jira and Xray.
Optional: configuring Zephyr Squad#
If you are using Zephyr Squad Jira plugin for test case management, it is possible to connect it to Zebrunner by completing the steps below.
Note
It is assumed that you already have Jira configured as described above.
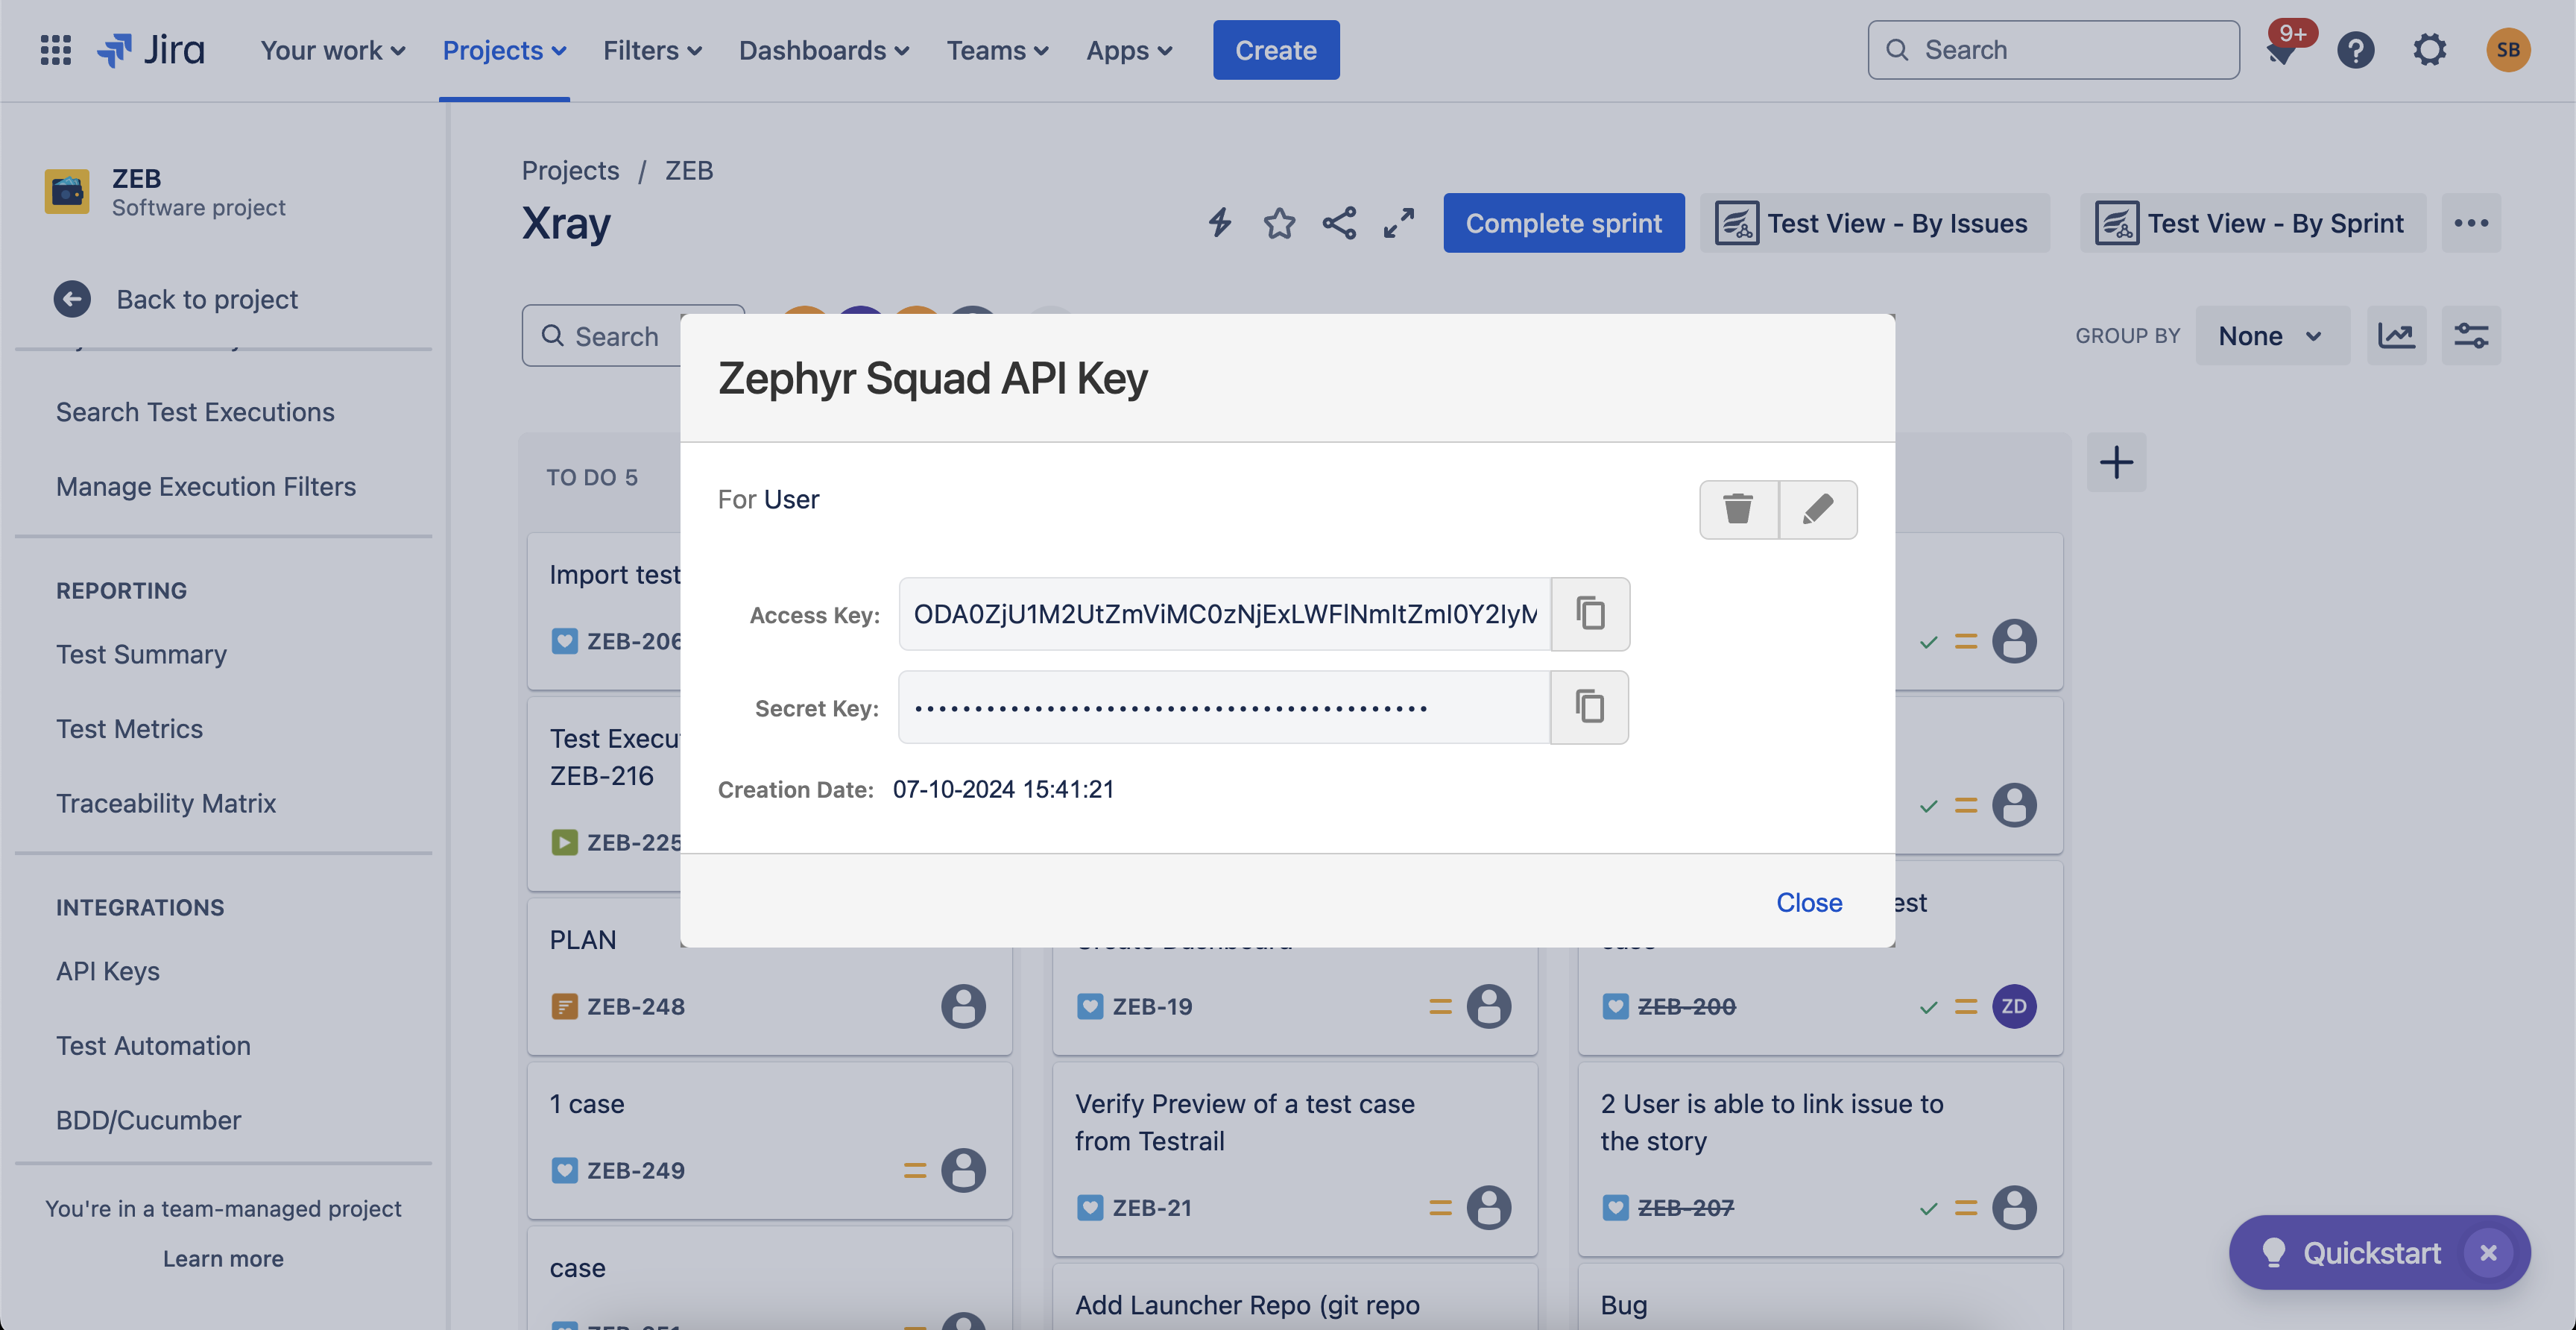
Obtaining Access Key, Secret Key, and Account Id#
- Log in to your Jira workspace
- Select a project with configured Zephyr Squad plugin
- From expand menu on the left side click the Zephyr Squad button
- In the Integrations section, click the API keys
- Click the Generate new key button
- Copy the generated Access Key and Secret Key
- Click the Profile and Settings icon located in the top right corner and choose Profile
- From the browser address bar, copy your Account Id. URL will have the following format:
https://<workspace>.atlassian.net/jira/people/<accountId>
Configuring Zephyr Squad plugin for Jira integration#
- Either click button for an existing Jira integration or continue creating a new one
- Tick the Enable TCM checkbox and select the Zephyr Squad from the dropdown menu
- Paste copied Account Id, Access Key and Secret Key
- Click the Save button
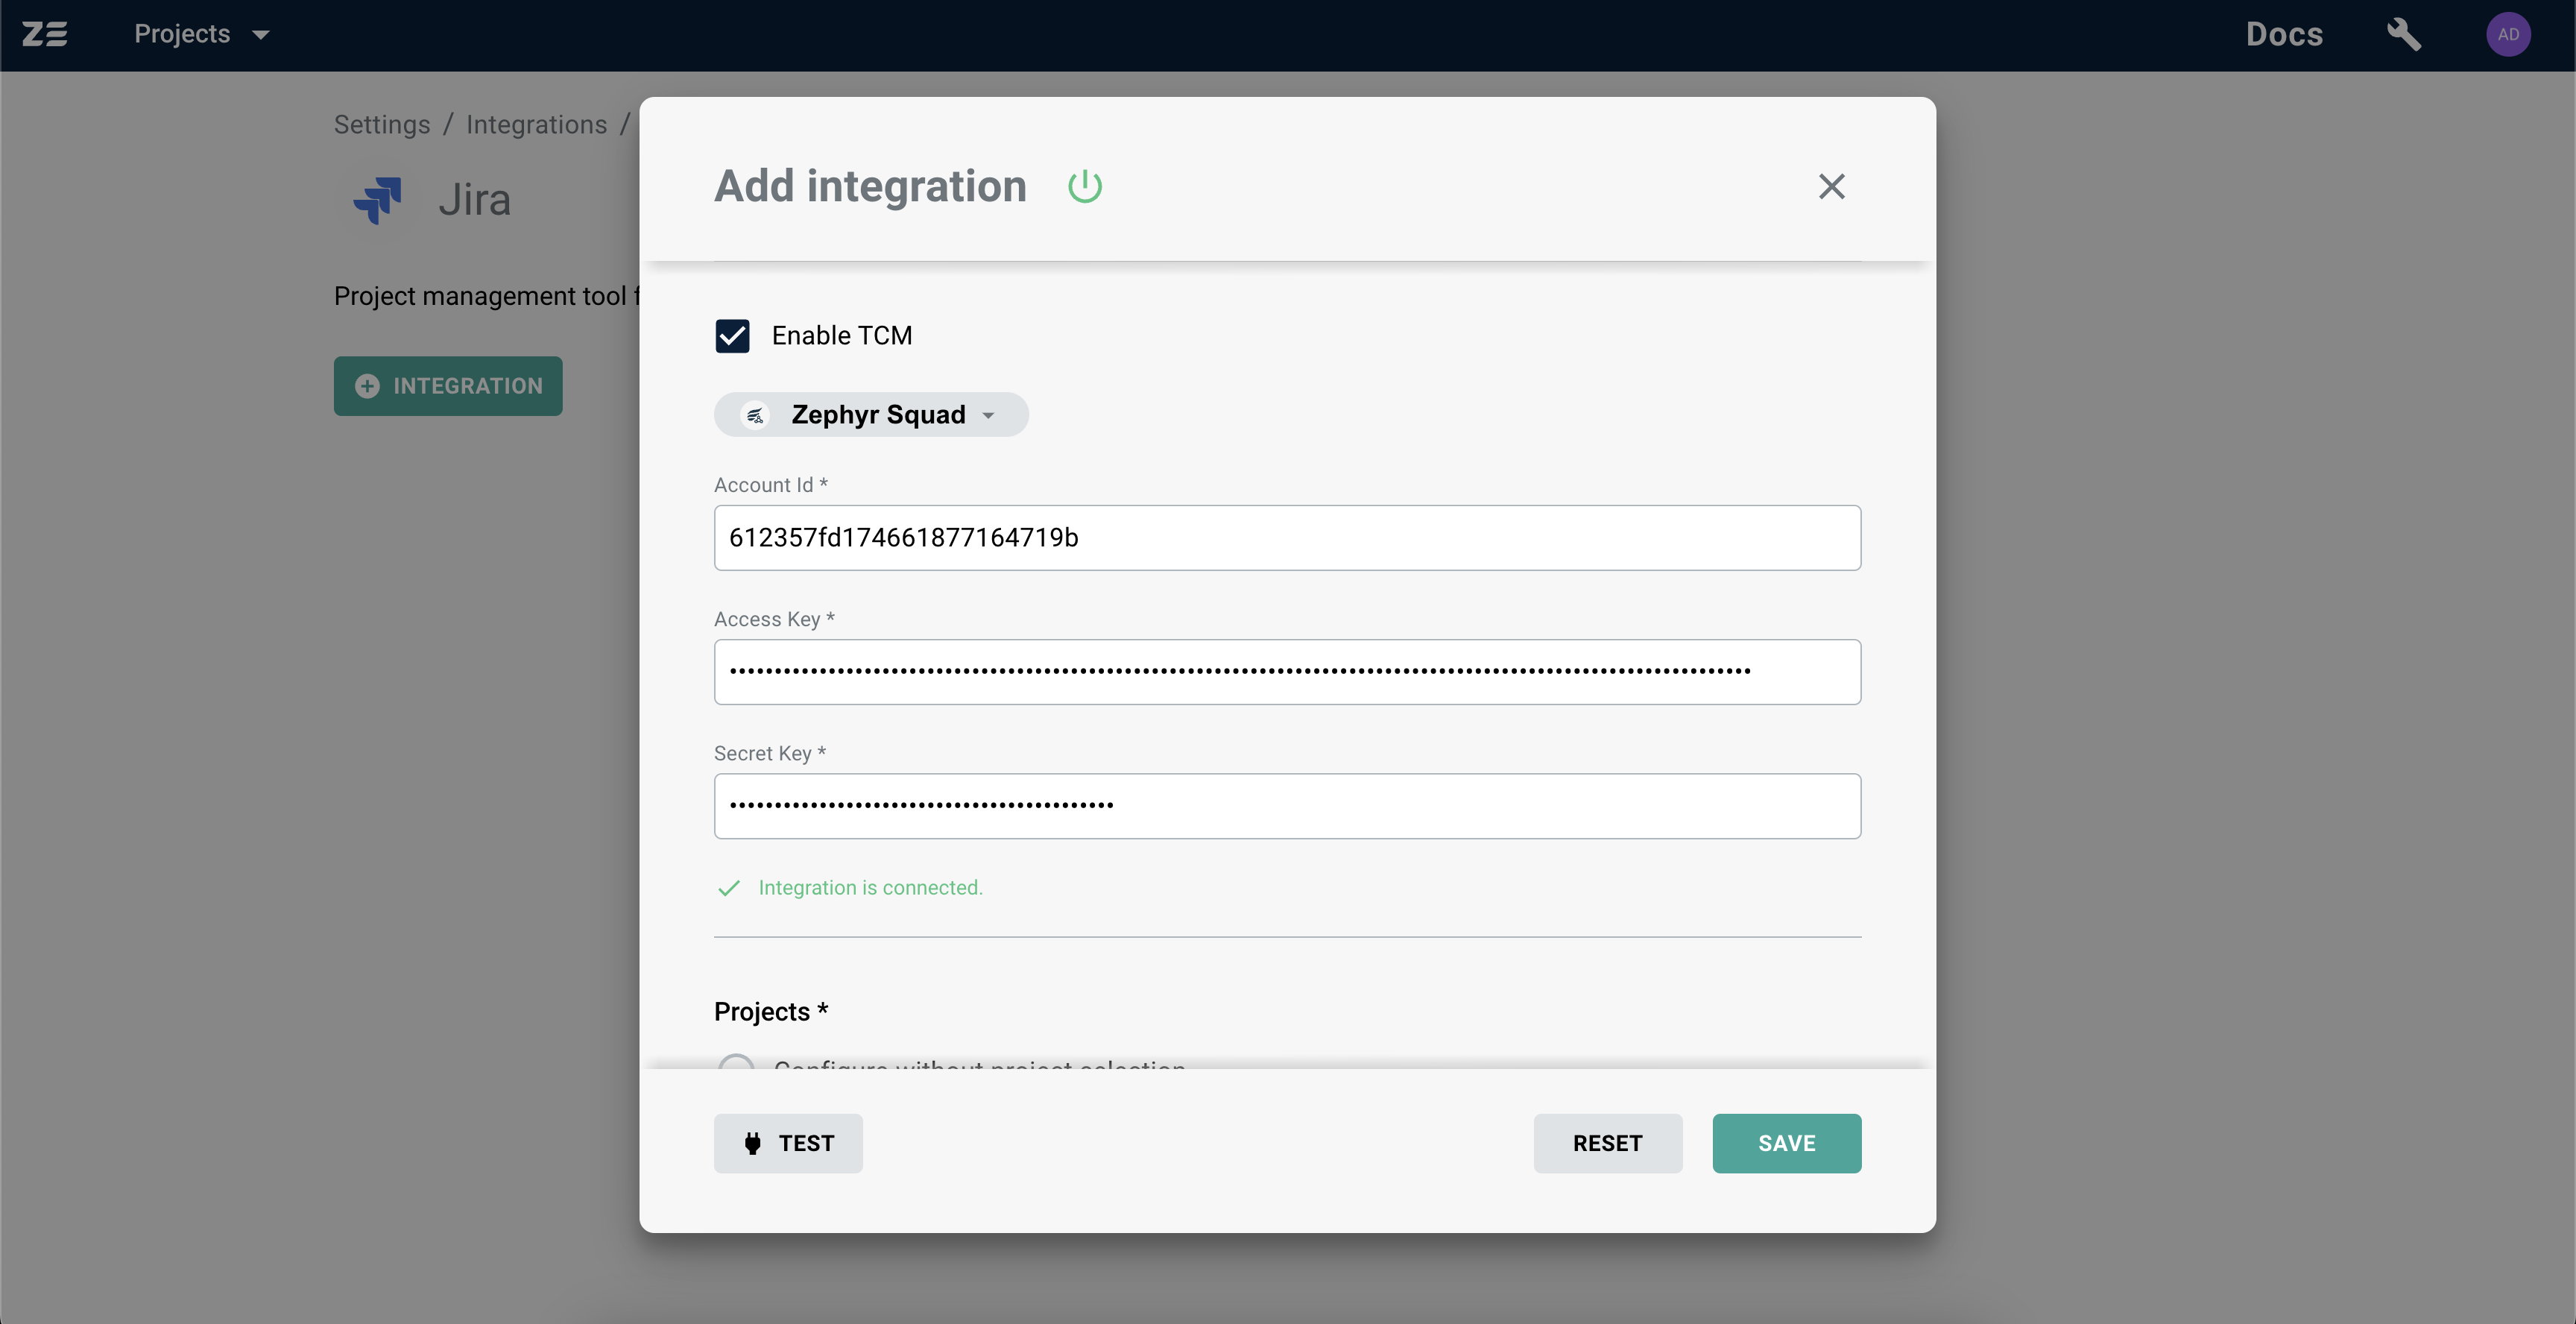
Integration is now configured. The Test button now checks connection with both Jira and Zephyr Squad.
Optional: configuring Zephyr Scale#
If you are using Zephyr Scale Jira plugin for test case management, it is possible to connect it to Zebrunner by completing the steps below.
Note
It is assumed that you already have Jira configured as described above.
Obtaining Access Token#
- Log in to your Jira workspace
-
Click the Profile and Settings icon located in the top right corner of the screen and choose the Zephyr Scale API Access Tokens
Note: if you don't see Zephyr Scale API Access Tokens section, you probably don't have permissions. In this case, contact your Jira administrator
-
Click the Create access token button
- Copy the generated token

Configuring Zephyr Scale plugin for Jira integration#
- Either click button for an existing Jira integration or continue creating a new one
- Tick the Enable TCM checkbox and select the Zephyr Scale from the dropdown menu
- Paste copied Access token
- Click the Save button
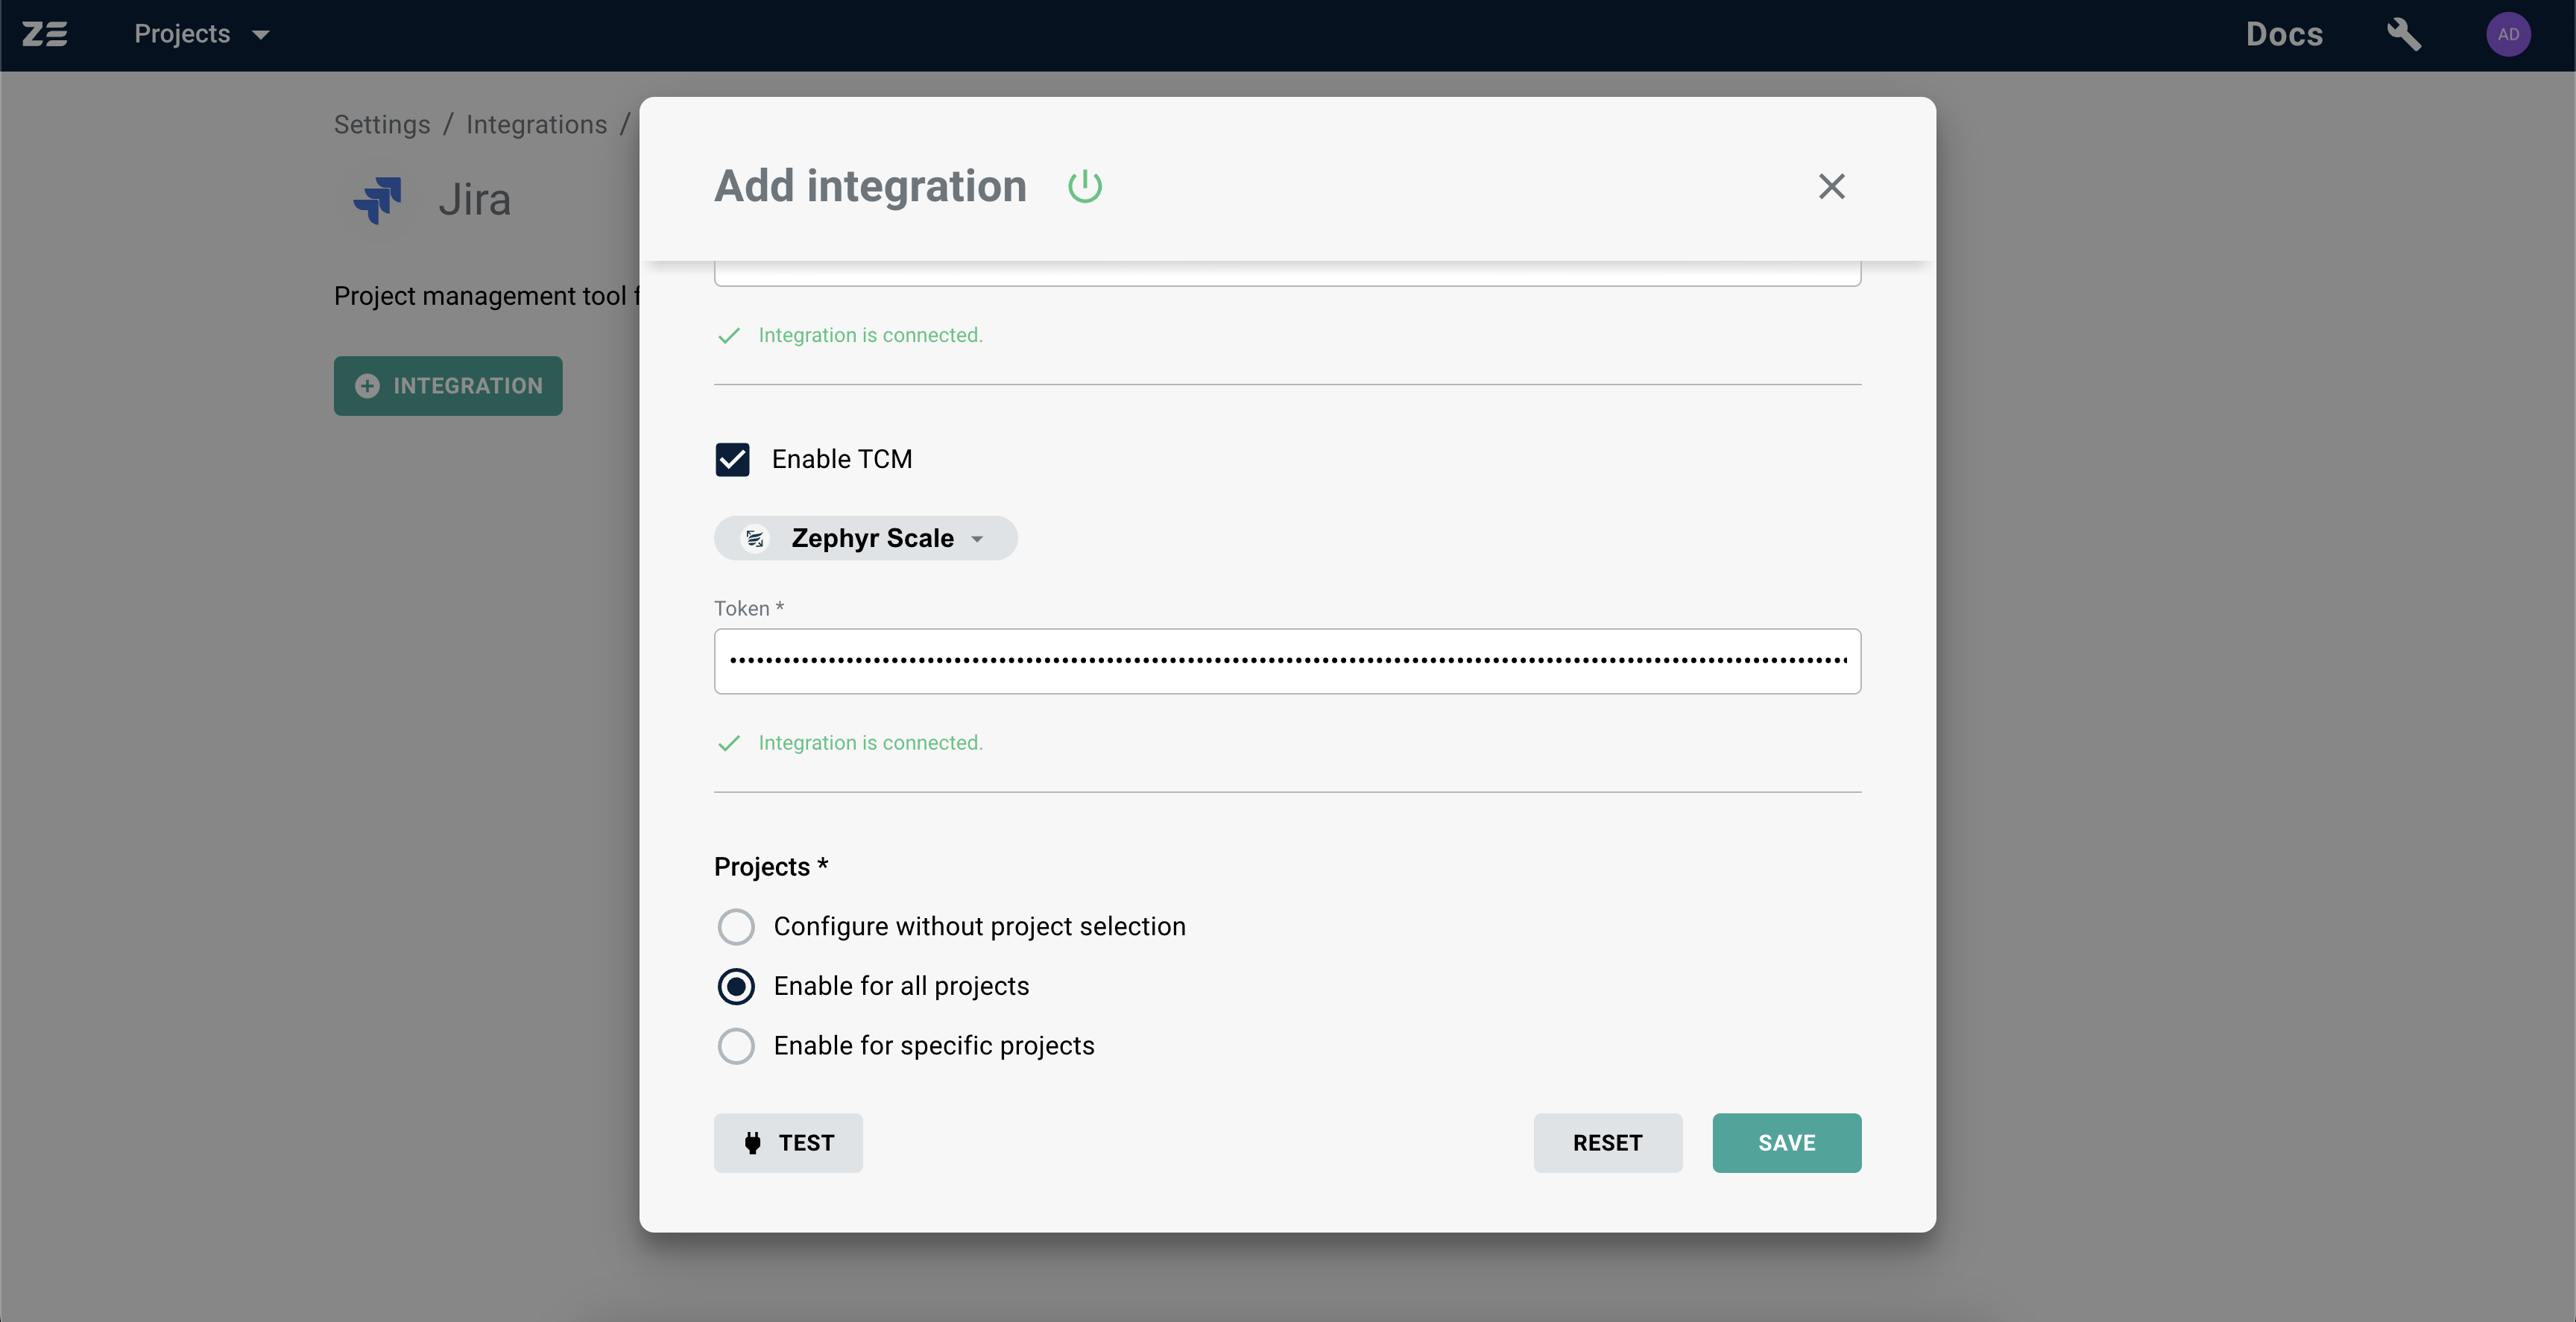
Integration is now configured. The Test button now checks connection with both Jira and Zephyr Scale.
Jira Server/DC#
The following steps need to be performed to add an integration with Server/DC distribution of Jira:
- Navigate to Setting → Integrations → Jira
- Click the Integration button
-
Select the Server/DC as the Jira type, enter your Jira hostname, username (or email) and password
Note: Server/DC Jira deployment doesn't provide possibility to generate an API token for authentication, so Jira password has to be used instead.
-
Select the projects to add the integration to. For more information, refer to Selecting projects documentation
- (optional) Click the Test button to check connectivity
- Click the Save button
Optional: configuring Xray#
If you have Xray for Jira Server installed, it will be configured automatically - no additional steps required.
Optional: configuring Zephyr#
Not supported
Jira app#
The Jira app enables seamless integration between Zebrunner and Jira, allowing you to display test cases, executions and test runs from Zebrunner workspaces directly within Jira issues.
Note
The Jira app can be used in Jira Software and Jira Service Management projects, and is available for Zebrunner Test Case Management and Testing Platform subscriptions.
Configuration of Zebrunner workspace#
Preparing the integration#
To get started, either choose or create a Jira integration within your Zebrunner workspace. During setup, select the specific projects on both Zebrunner and Jira sides. The selected projects will limit the visibility of data between the two systems.
Enabling the Jira app#
To enable the Jira app for a prepared integration, perform the following steps:
- Click the 3-dot button next to the Jira integration and select Enable Jira app
-
In the modal, click the Install app in Jira button. You will be redirected to Atlassian Marketplace where you need to get the app
-
In the same modal, authorize the connection between Zebrunner and Jira by clicking the Authorize with Jira button. Confirm the connection
-
Once authorized, you will see a Jira app is enabled label for the integration
Note
Multiple integrations for the same Jira workspace may have the Jira app enabled.
Disabling the Jira app#
To disable the Jira app for an integration, perform the following steps:
- Click the 3-dot button next to the integration and select Disable Jira app
- In the modal, click the Confirm button
- After confirmation, Jira app is enabled label will be removed
Note
After disabling the Jira app for an integration, the Jira app’s configuration page will still display the Zebrunner workspace. This is because other integrations within the Zebrunner workspace may integrate with this Jira workspace. To completely remove connections with all integrations in the Zebrunner workspace, remove the workspace from the configuration page in Jira.
Configuration of Jira workspace#
When the app is installed, you can view and delete Zebrunner workspaces that are connected to the workspace.
Note
You must have workspace owner/admin permissions to access this page.
To navigate to the configuration page, perform the following steps:
- Open your Jira workspace
- Click the Apps dropdown and select Manage your apps
- In the User-installed apps list, click on Zebrunner for Jira
- Click the Configure button
To delete a Zebrunner workspace you need to click the Delete button next to the URL of the Zebrunner workspace.

Note
This action will delete connection with the Zebrunner workspace from Jira and will remove the Jira app is enabled label for all the corresponding Jira integrations in Zebrunner.
Accessing Zebrunner data in Jira issue#
Once the app is enabled, you can view information about the linked Zebrunner test cases (along with their latest executions) and test runs directly within the Jira issues. To link a test case or a test run to a Jira issue, you need to specify the issue as Requirement for the test case or test run in Zebrunner in the corresponding system field.
To open the Zebrunner widget inside a Jira issue, you need to click the Apps button and select Zebrunner. Due to Jira's limitation, you have to open the widget this way inside every issue where you want to access the data from Zebrunner, but have to do this only once per issue.
The widget is organized into tabs, each of which displays specific data from Zebrunner.
Test Cases tab displays the test cases linked to the Jira issue. Key details include the test case title, priority, automation state, the last five execution results, and specific details for each execution. Also, there is a link to the test case in Zebrunner.
Test Runs tab provides an overview of test runs linked to the Jira issue, showing details such as the environment, configurations, test case statistics chart, and link to the test run in Zebrunner.
Note
- To open the Zebrunner widget in Jira projects, you must have user-level or higher permissions.
- To open the Zebrunner widget in Jira Service Management projects, you must have workspace owner/admin permissions.
- To view information within the Zebrunner widget, you must have user-level or higher permissions.