Users, seats and permissions#
User is a unique person who is given access to Zebrunner workspace and its functionality. Maximum amount of users is defined by the number of user seats available for your subscription. Depending on the group they belong to, users can have different sets of permissions, defining what they can (and cannot) do in the system.
Inside any workspace, there are two default groups of users:
-
Admins — the main group of workspace users that have dominant rights over other users. CAN create projects, edit or delete ANY project, add or delete members of ANY project (even private). CAN invite users to the workspace.
-
Users — a group of workspace users having common permissions. CANNOT create projects, CANNOT edit or delete projects unless they are assigned as project Administrators or Managers. CANNOT invite users to the workspace.
Note
When working inside the project, permissions are defined by project roles (not to be confused with workspace groups). To learn more about project access control concepts please study Project members and roles*
Admins/Users can be invited to the workspace from the Users or Invitations grids (by workspace Admins only). To access the Users/Invitations grids, click the Settings icon in the header and choose Users/Invitations on the Settings page.
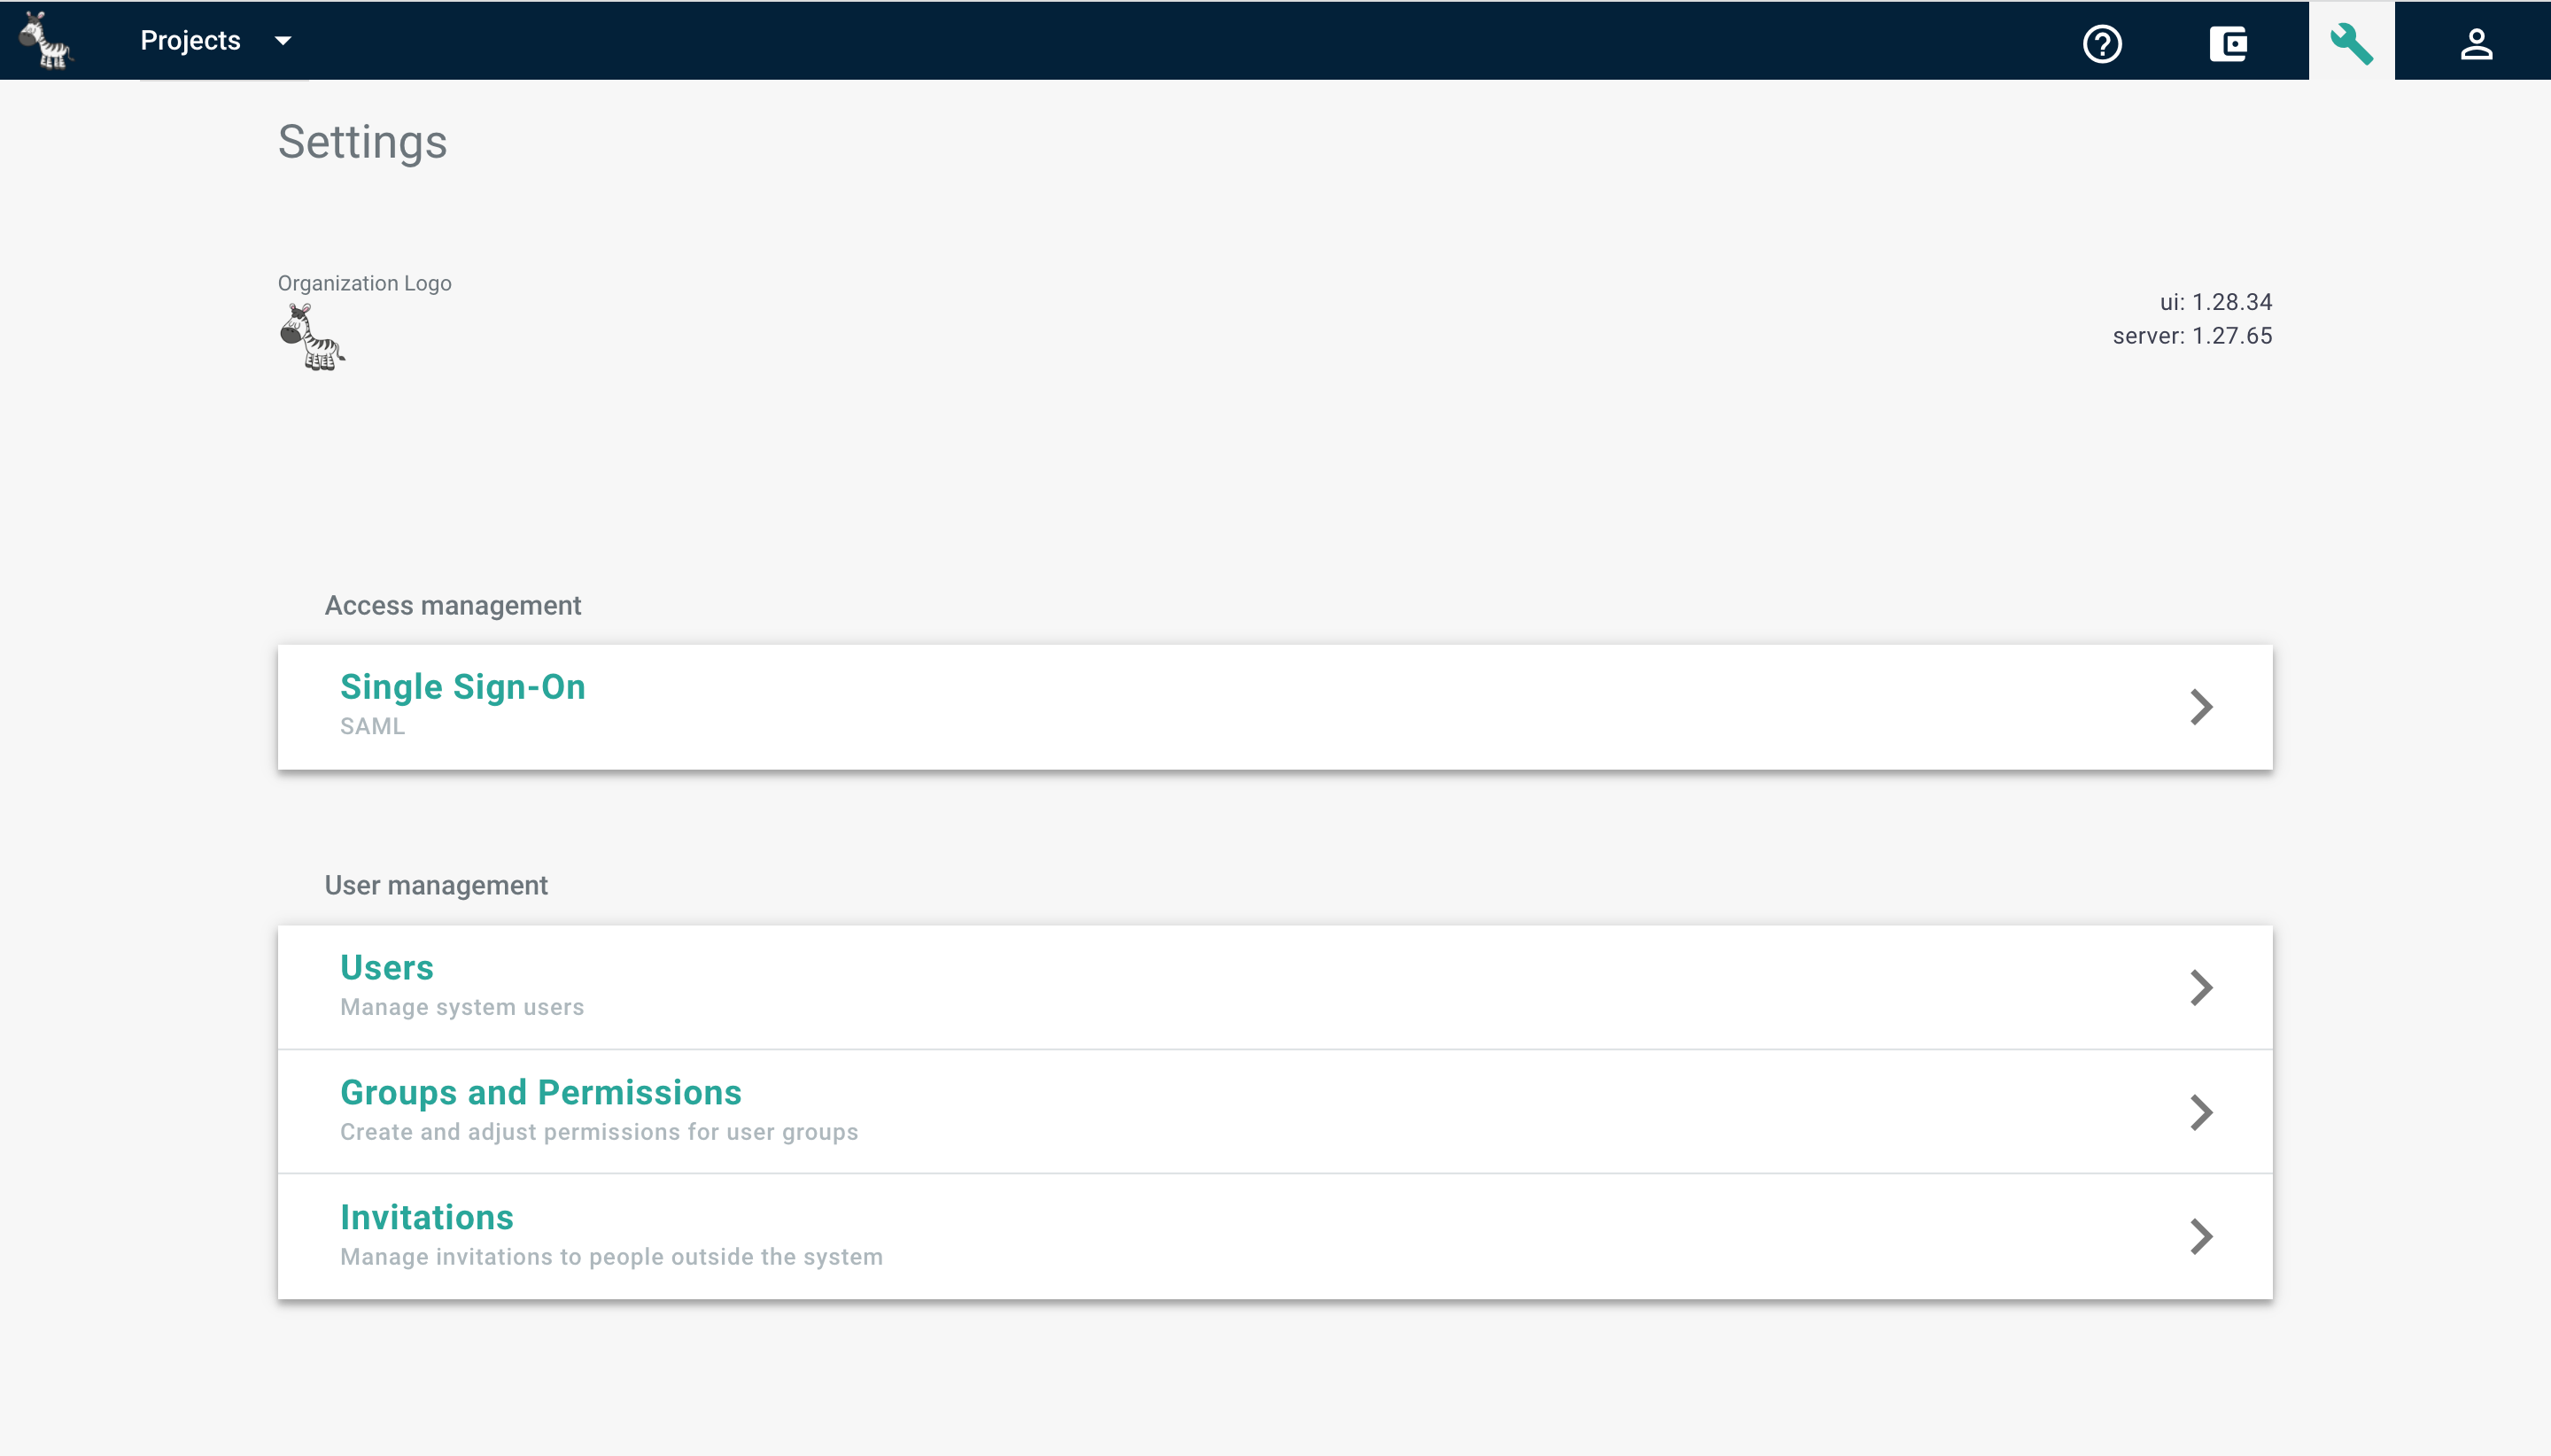
Note
In most of the cases, the functionality described in this section is only applicable to workspace Admins who usually need to manage the users and set the important configurations. If you don't have Admin permissions, you cannot access the Settings page. Please contact your Admin to invite other users.
Managing user seats#
User seats define maximum possible amount of users who can have concurrent access to the workspace. Only active workspace users are counted as a user seats.
Adding seats to your subscription#
You can add additonal seats to your subscription anytime by doing the following:
- Log into your Zebrunner account
- Navigate to Setting → Billing
- Select the Plan tab and click Add seats
- Specify the number of seats you want to add and click Purchase
Once the payment is completed you'll see an updated number of seats. The Plan tab also displays the current amount of active users and seats.
Note
- When adding seats in the middle of billing cycle, you are charged a prorated amount for the seats you are adding
- Only users belonging to Admins group can add seats to the subscription
- If you are using an On-Premise version of the app or billing via invoices you will need to contact your Zebrunner manager to add seats
Removing seats from your subscription#
You can remove seats from your subscription anytime by doing the following:
- Log into your Zebrunner account
- Navigate to Setting → Billing
- Select the Plan tab and click Delete seats
- Specify the number of seats you want to delete and click Delete
Once the operation is completed you'll see an updated number of seats. The Plan tab also displays the current amount of active users and seats.
Note
- If you remove seats in the middle of the billing cycle, changes are applied immediately and reflect in the next billing cycle
- Only users belonging to Admins group can remove seats from the subscription
- If you are using an On-Premise version of the app or billing via invoices you will need to contact your Zebrunner manager to remove seats
Adding users to the system#
Please keep in mind: the maximum number of users that you can add to your workspace is determined by the amount of seats available for your subscribtion. If you'll try to exceed the amout of seats, you'll get an alert message and will need to buy additional seats or deactivate current workspace user(s).
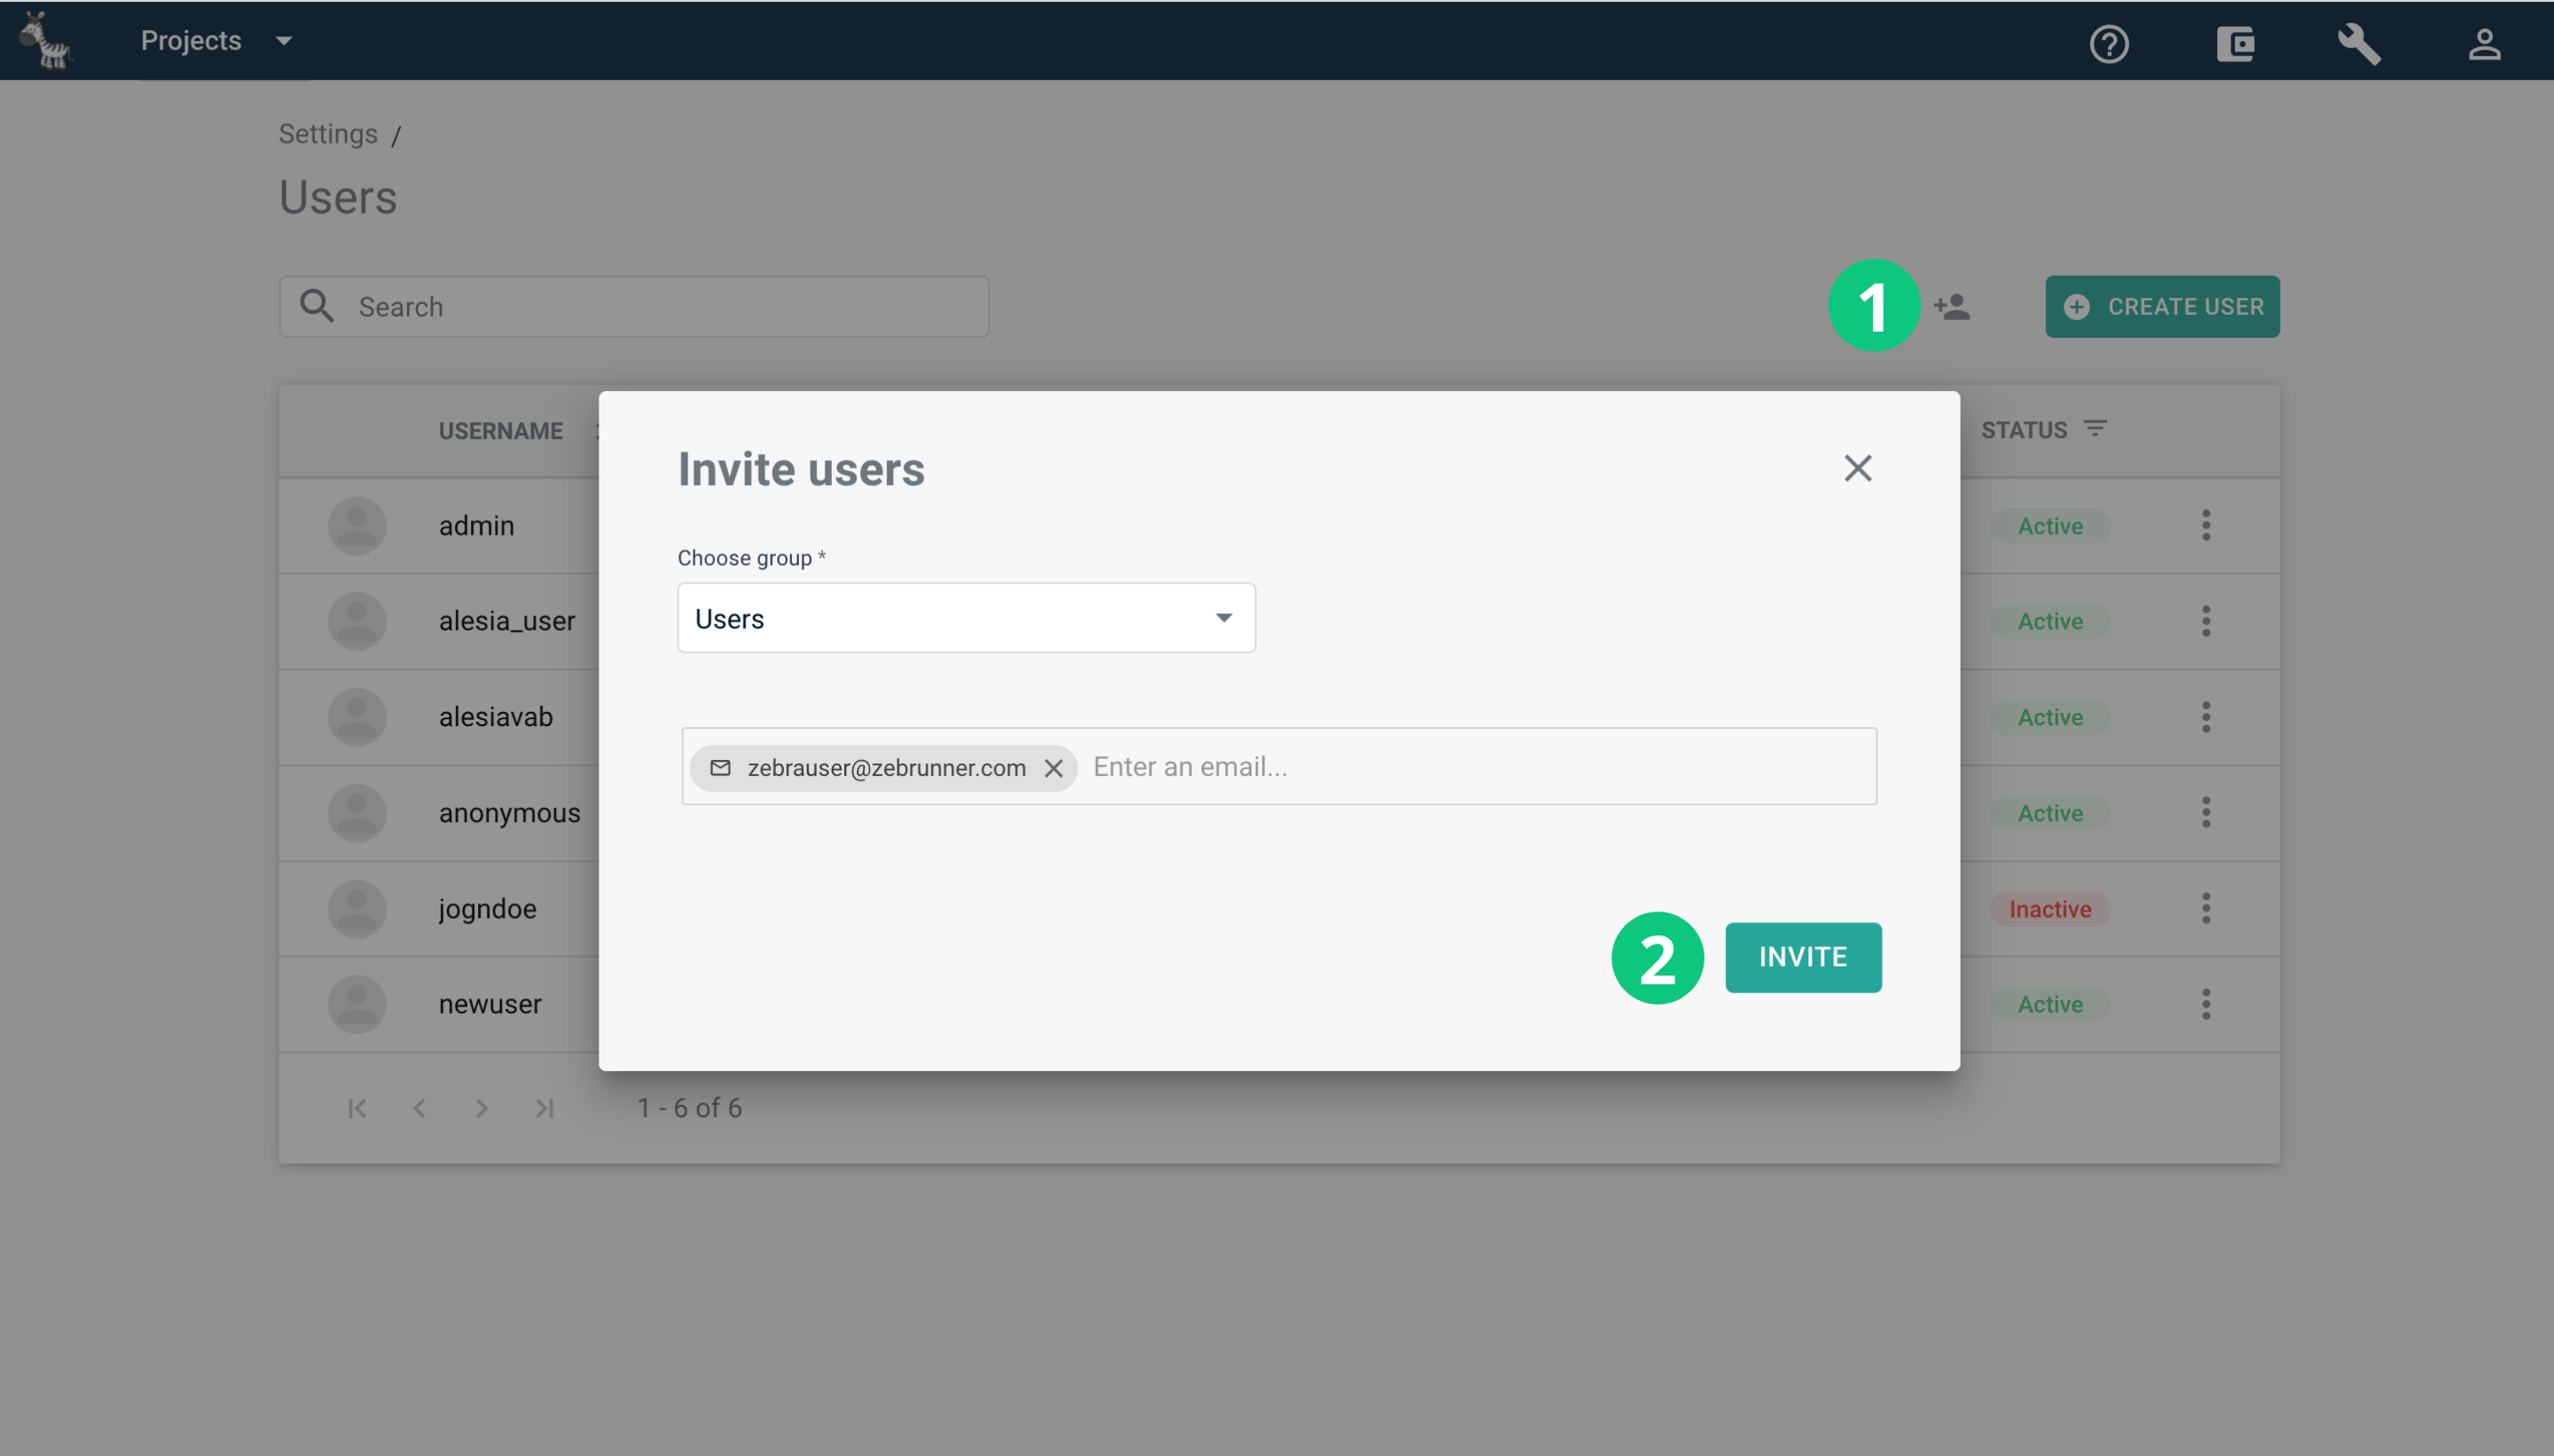
Inviting a new user#
This is the most common way to add a new user (either Admin or User) to the workspace.
To to this, perform the following steps:
- Access the Users or Invitations grid from Settings page
- Click Invite user above the users/invitations list, the Invite users dialogue will appear
- Choose a group to add user(s): Admins or Users
- Enter the email(s). You can enter an unlimited number of emails at a time
- Click Invite
Invitations will be sent to the specified emails and can be managed from the Invitations page. Invited users need to accept the invitation by following the link in the email and providing new creds.
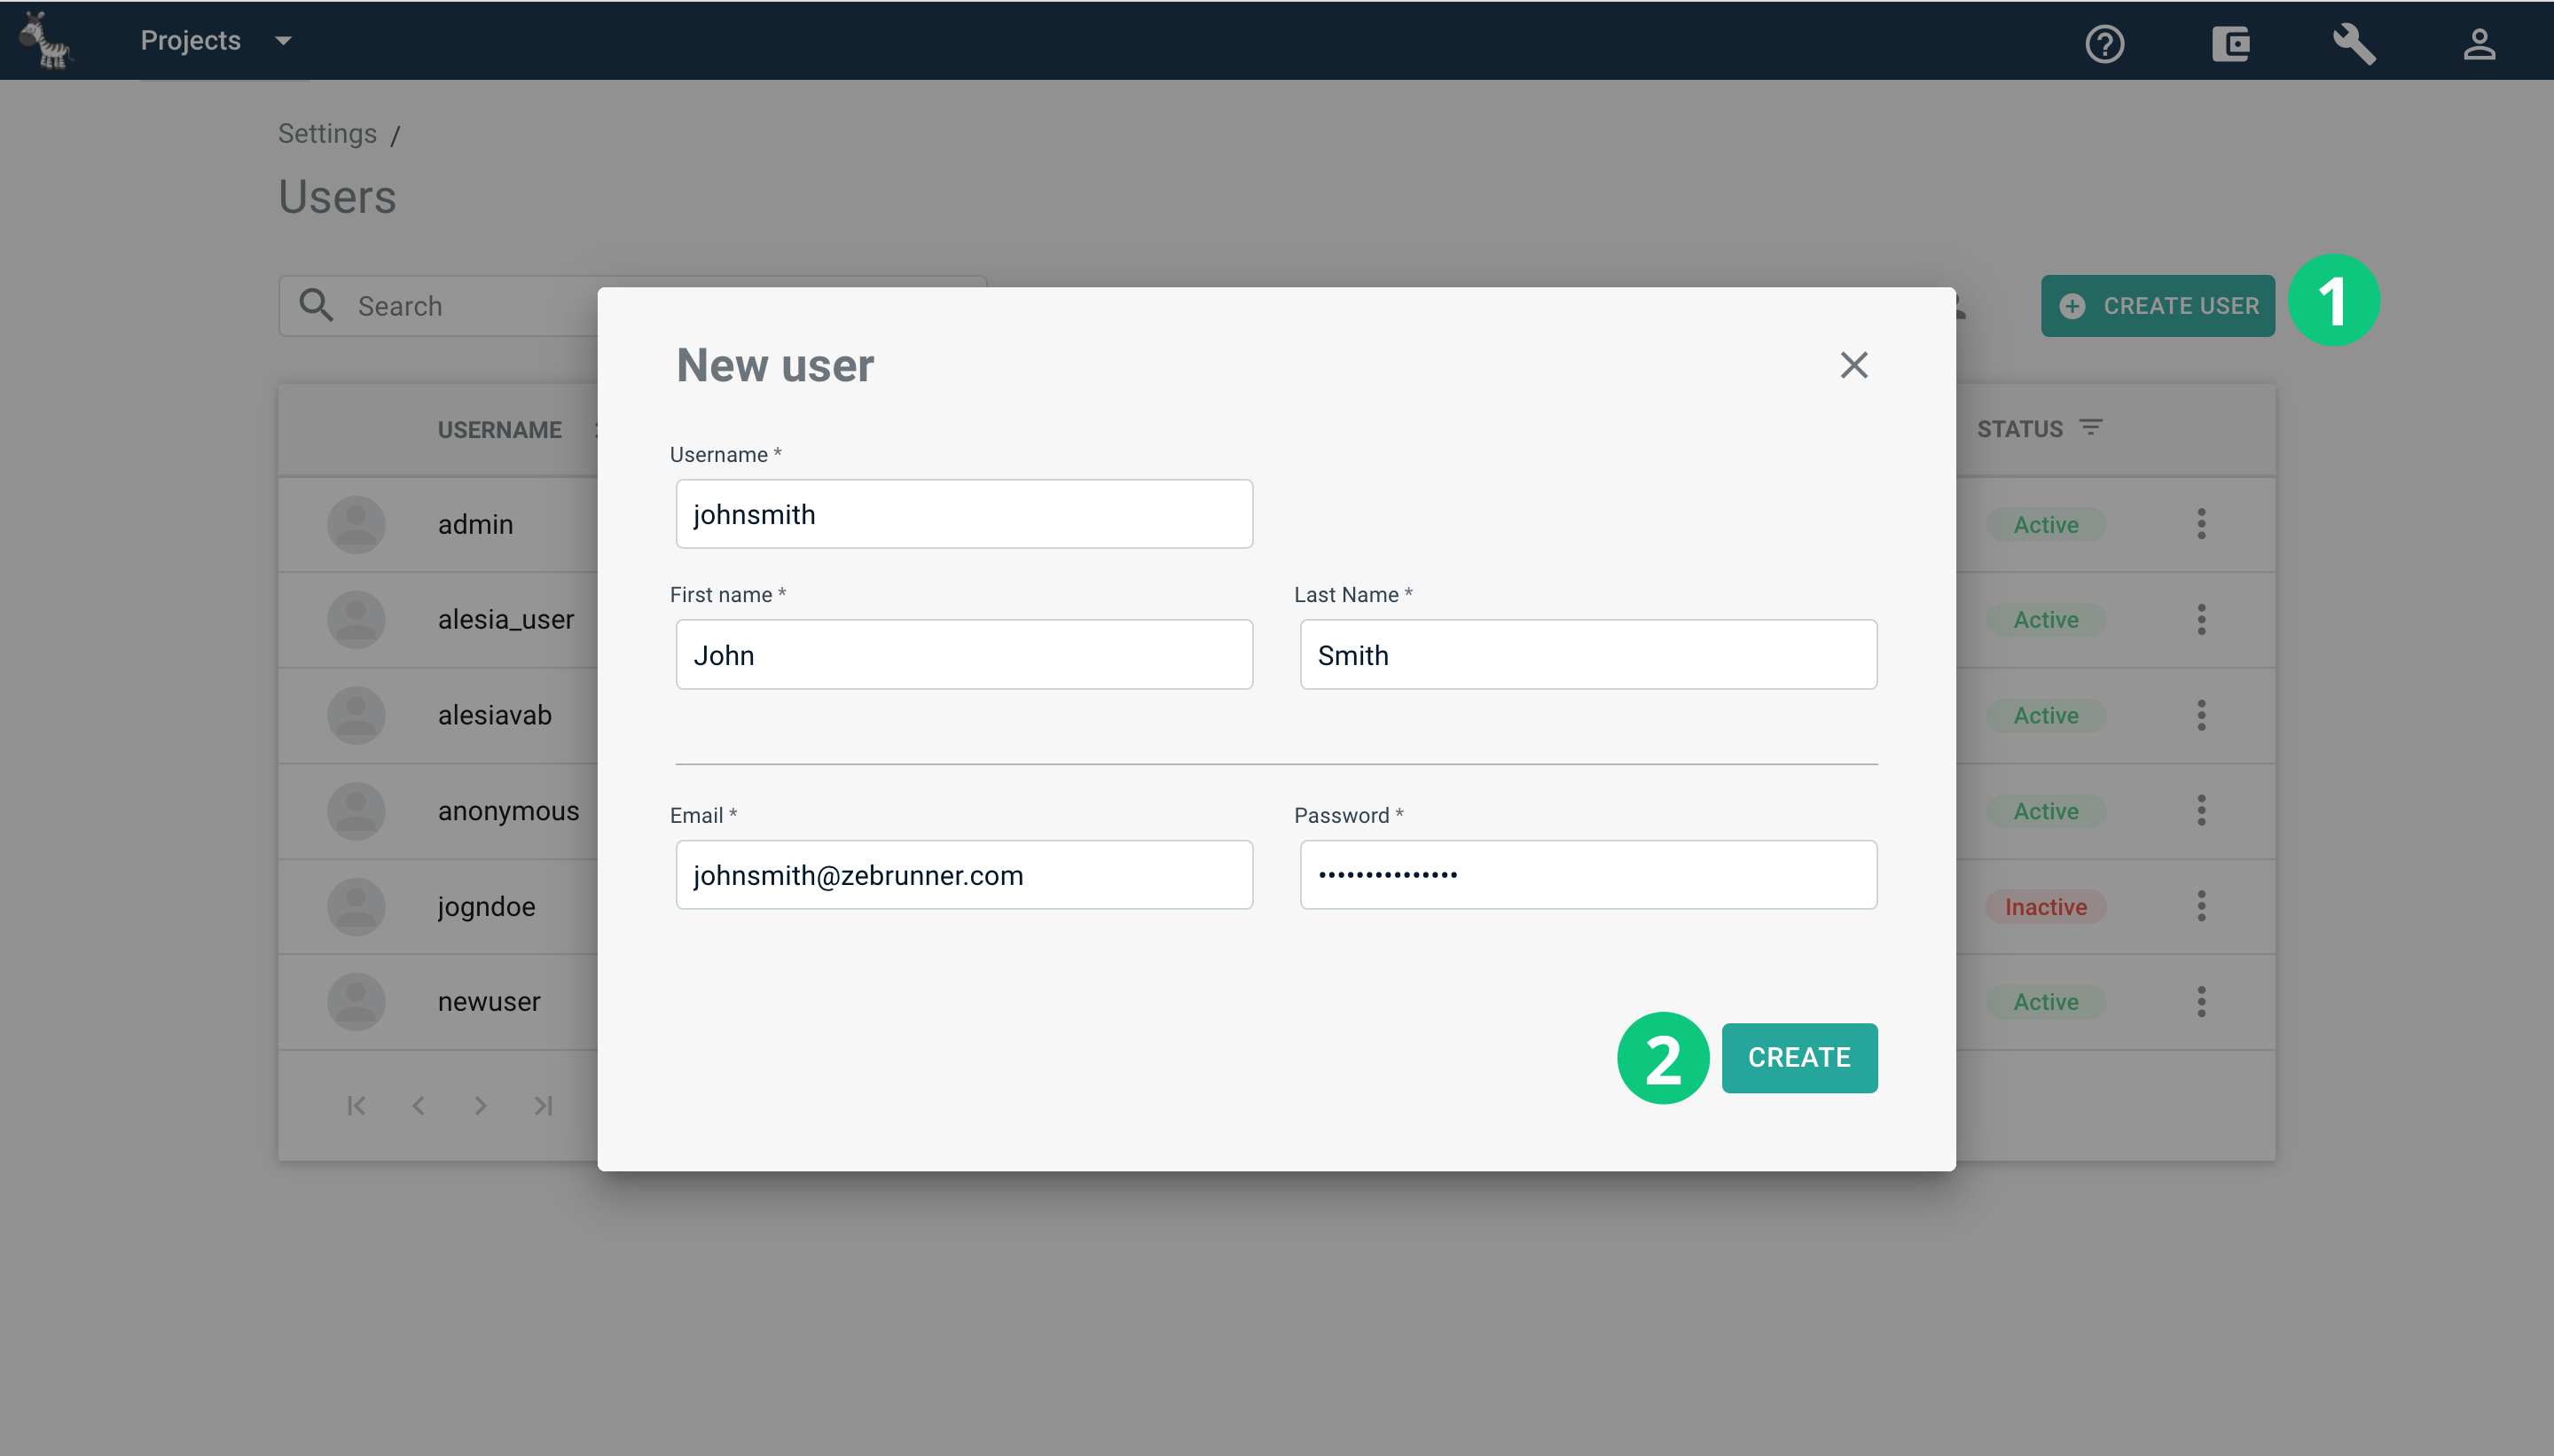
Creating a user#
Alternatively to inviting a new user via email, you can create a new User (not an Admin) without the need to send an invitation by providing the details yourself.
To do this, perform the following steps:
- Access the Users grid from the Settings page
- Click the Create user above the users list, the New user dialogue will appear
- Provide the details of your new user: username, first and last name, email and password
- Click Create
Your new user will appear in the list. You'll then need to share the creds for the user to access the workspace.
Managing users#
You can manage your existing users from the Users page (Settings -> Users).
Editing user details#
As a workspace Admin, you can alter user details like first and last name, email from Users page.
To do this, perform the following steps:
- Access the Users grid from the Settings page
- Go to the user you need and click More Options
- Select Edit, the Edit user dialogue will appear
- Apply the necessary changes to the user
- Click Save
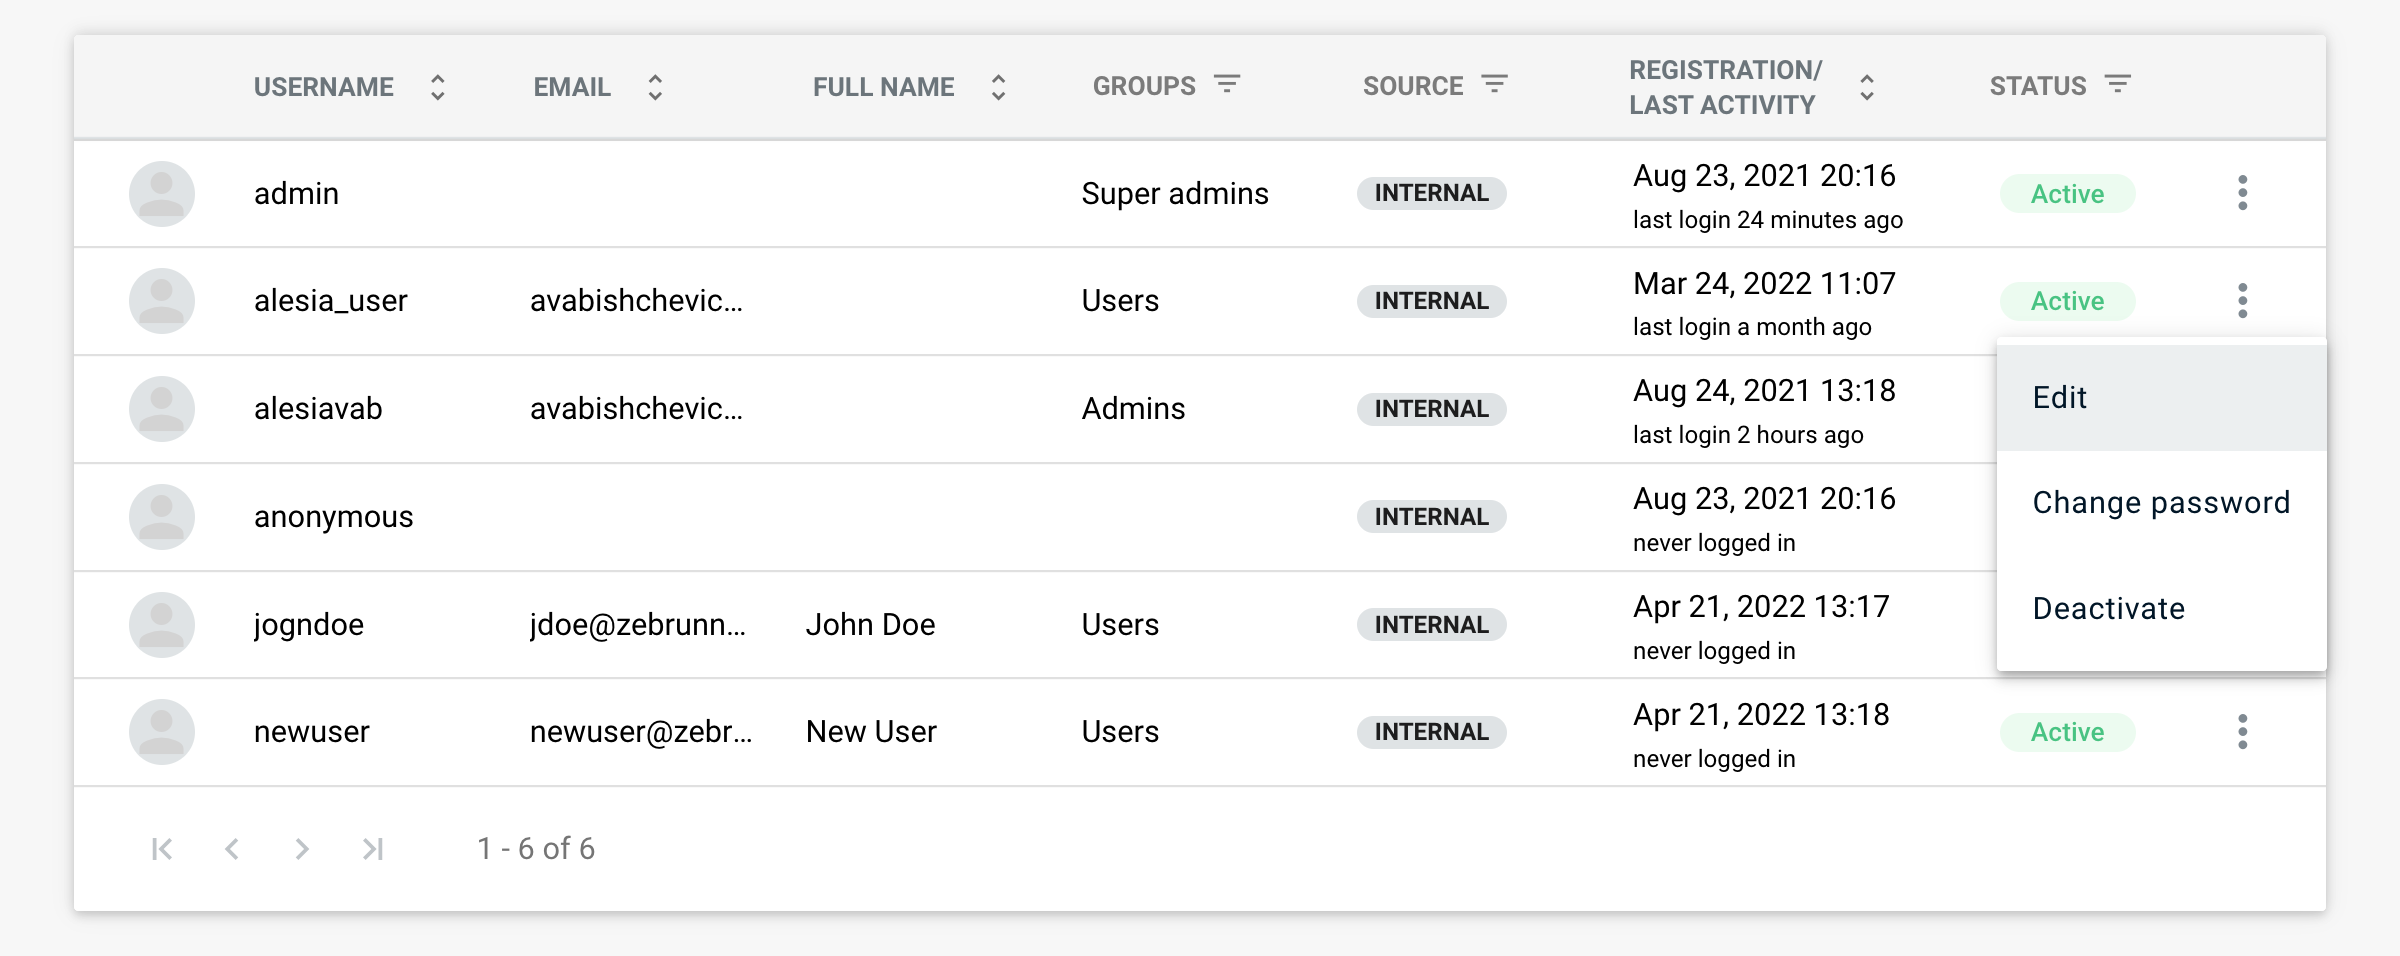
Moreover, you can change the password that a user utilizes to enter the workspace. In the More Options menu, select Change password and save the changes.
Deactivating a user#
If a user should no longer have access to the workspace, you can deativate them.
To deactivate a user, perform the following steps:
- Access the Users grid from the Settings page
- To the right of the user you'd like to deactivate, click More Options
- Select Deactivate and confirm the action
A Deactivated status will be desplayed in front the user's name.
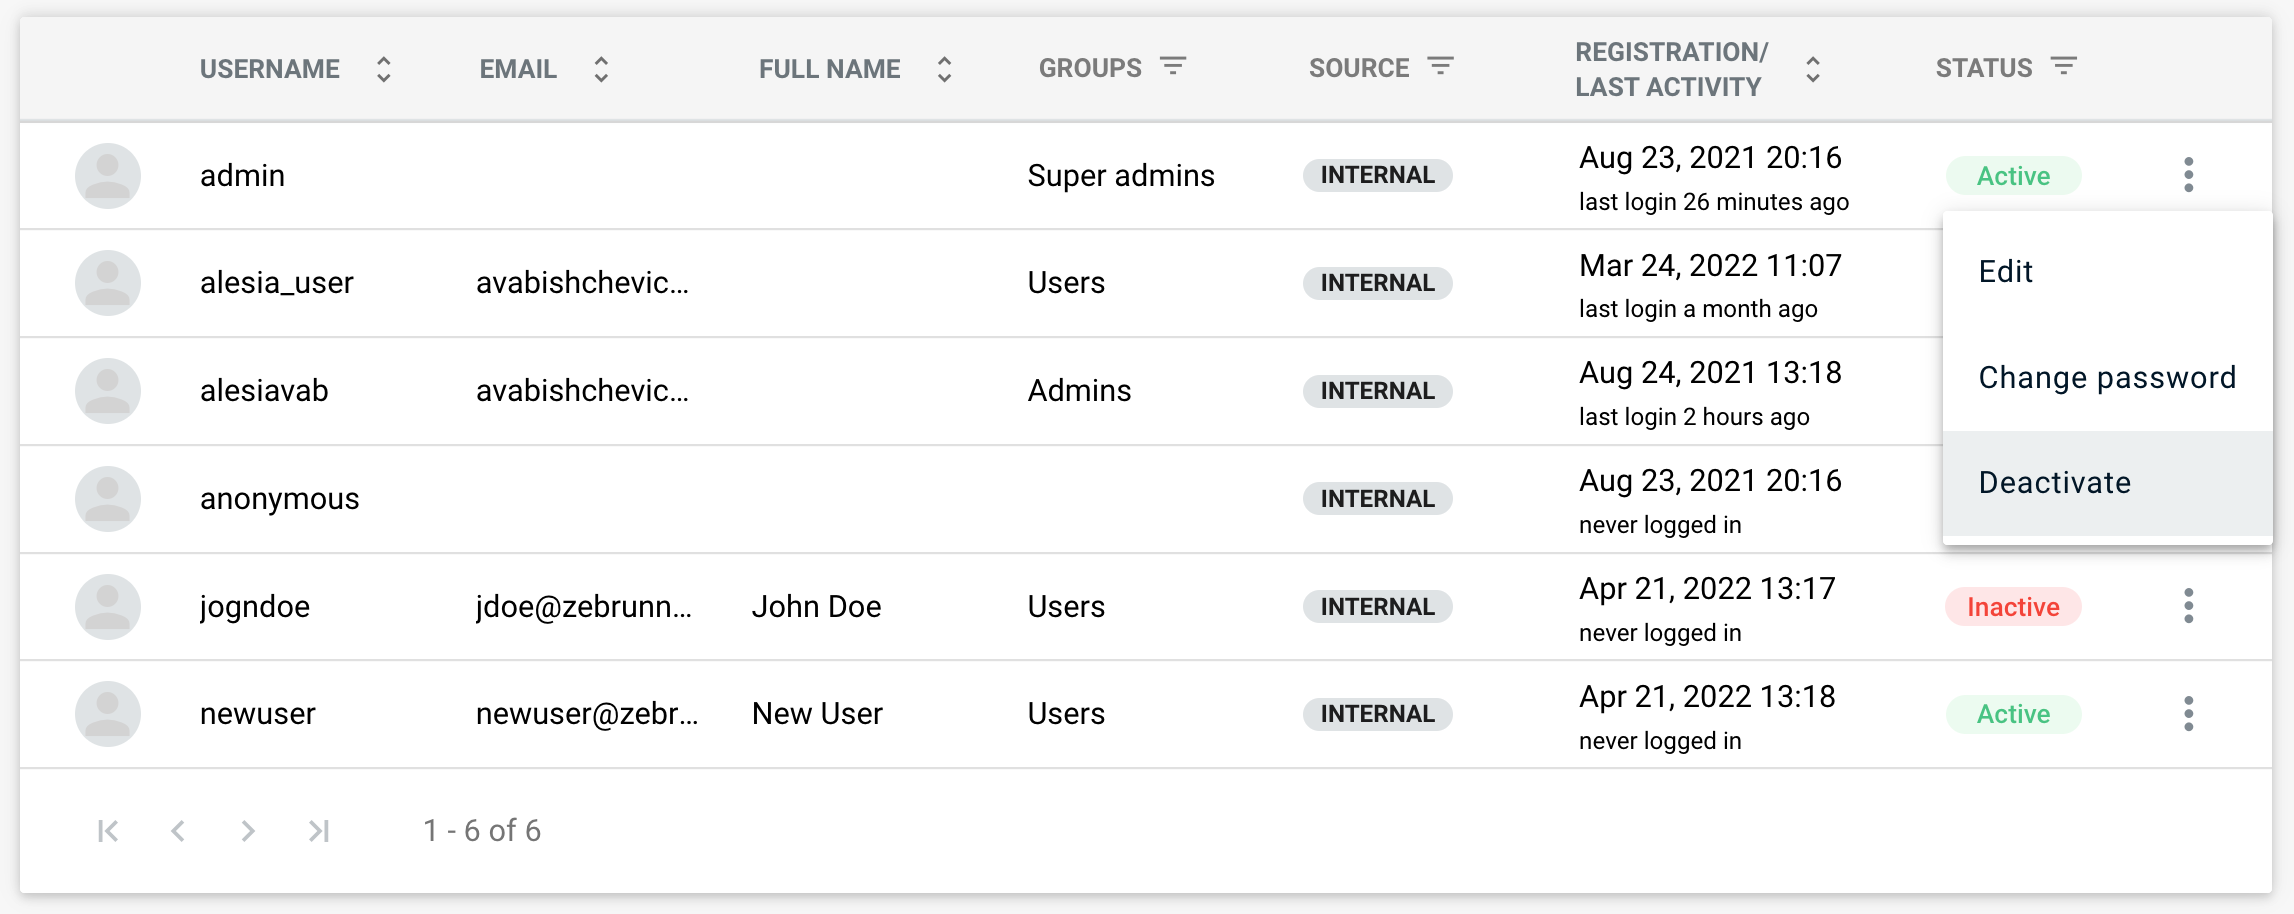
Info
You can perform this action from the Edit user dialogue as well.
It's possible to activate a user again by following the same steps.
Managing invitations#
You can manage already sent inviations from the Invitations page (Settings -> Invitations).
Resending an invitation#
To resend an invitation, perform the following steps:
- Access the Users grid from the Settings page
- To the right of the invitation you’d like to resend, click More Options
- Click Resend and confirm the action.
The invitation will be resent to the same email address (a new invitation token will be created).
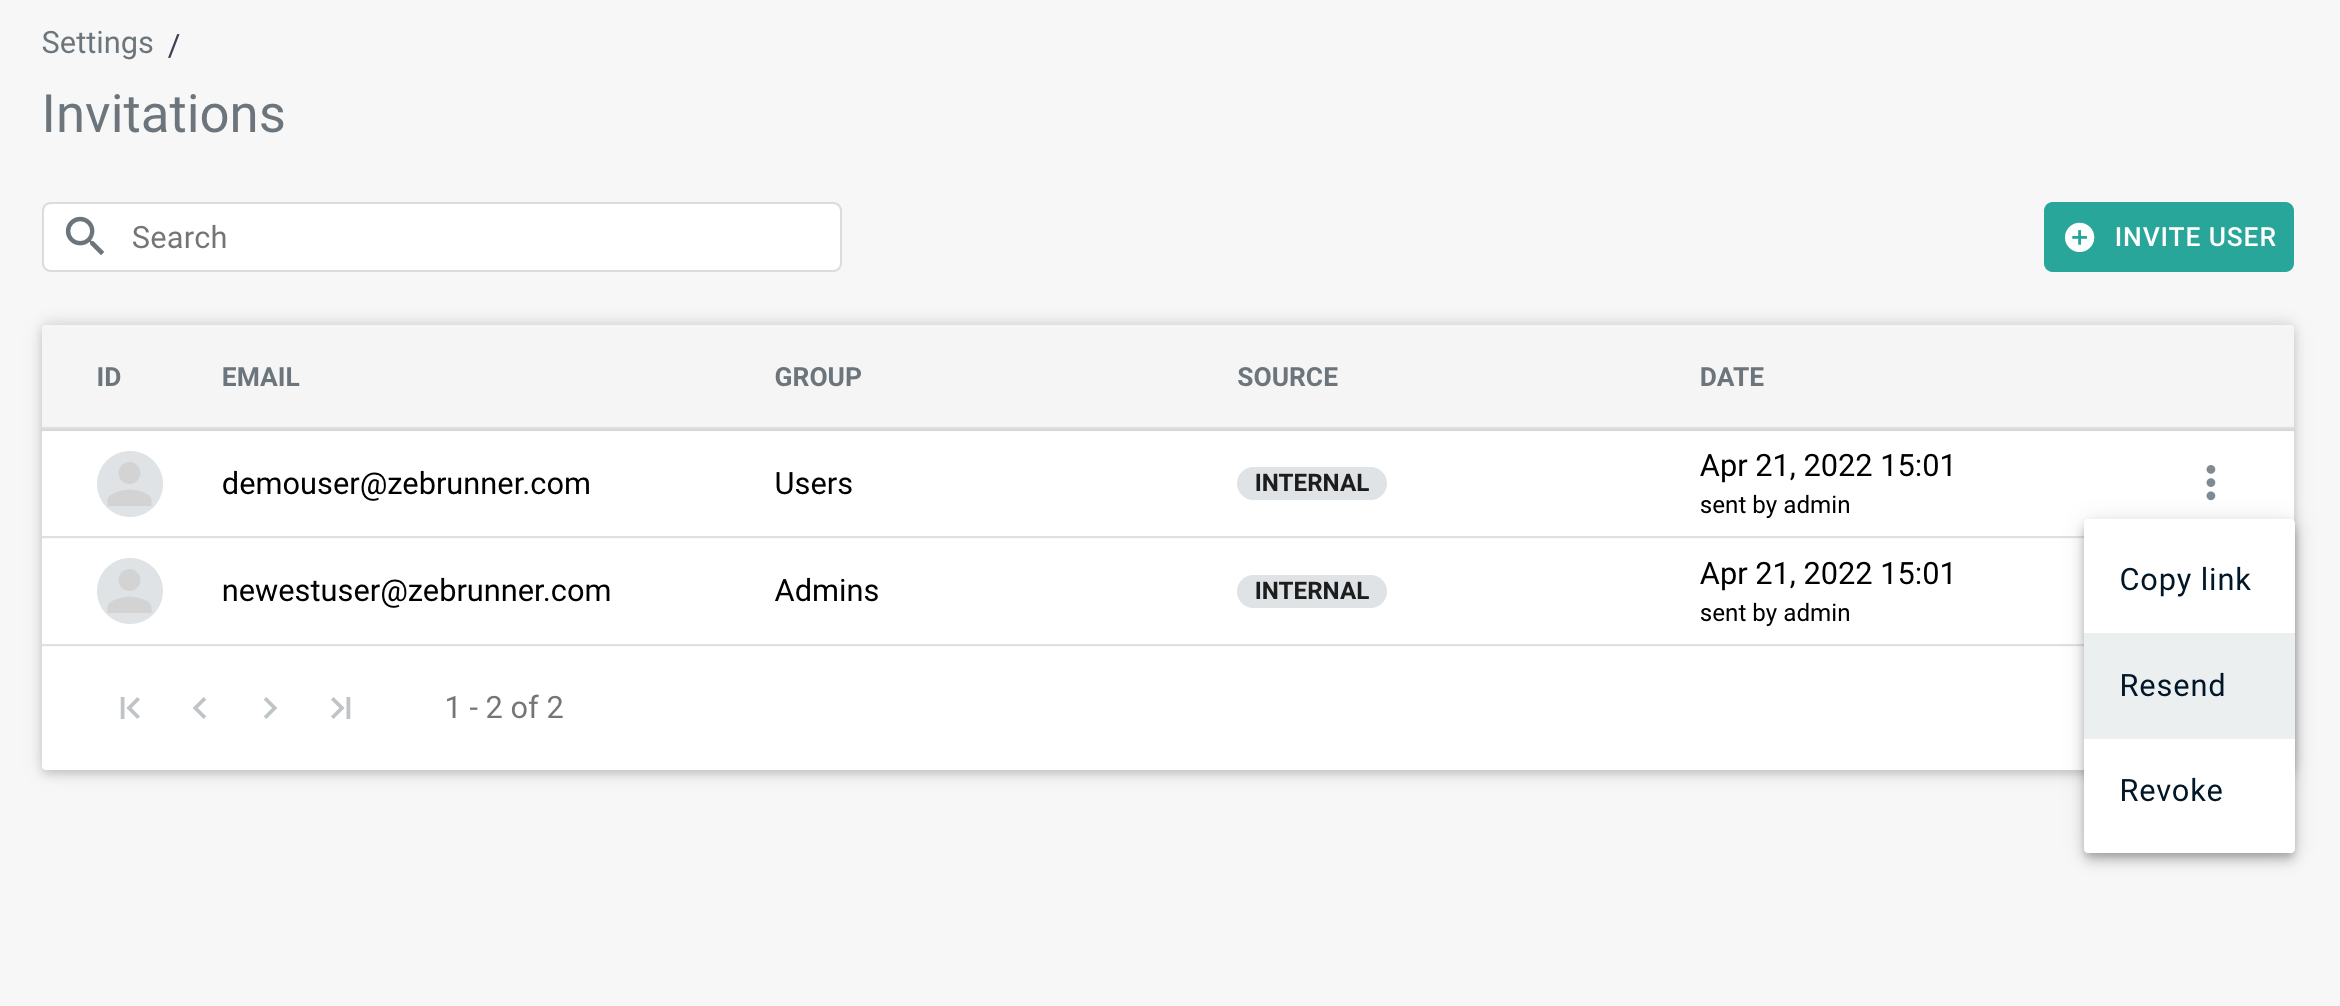
If you want to copy the link to the invitation and send it directly to the invited user, select Copy link in More Options . The link will be copied to your buffer.
Revoking an invitation#
You can revoke an already sent invitation.
For this, perform the following steps:
- Access the Users grid from the Settings page
- To the right of the invitation you’d like to revoke, click More Options
- Click Revoke and confirm the action
The invited user will not be able to use this link anymore, and the invitation will disappear from the Invitations grid.

Managing groups and permissions#
You can manage your existing groups (e.g. change what groups your users belong to) and adjust group permission from the Groups and Permissions page (Settings -> Groups and Permissions).
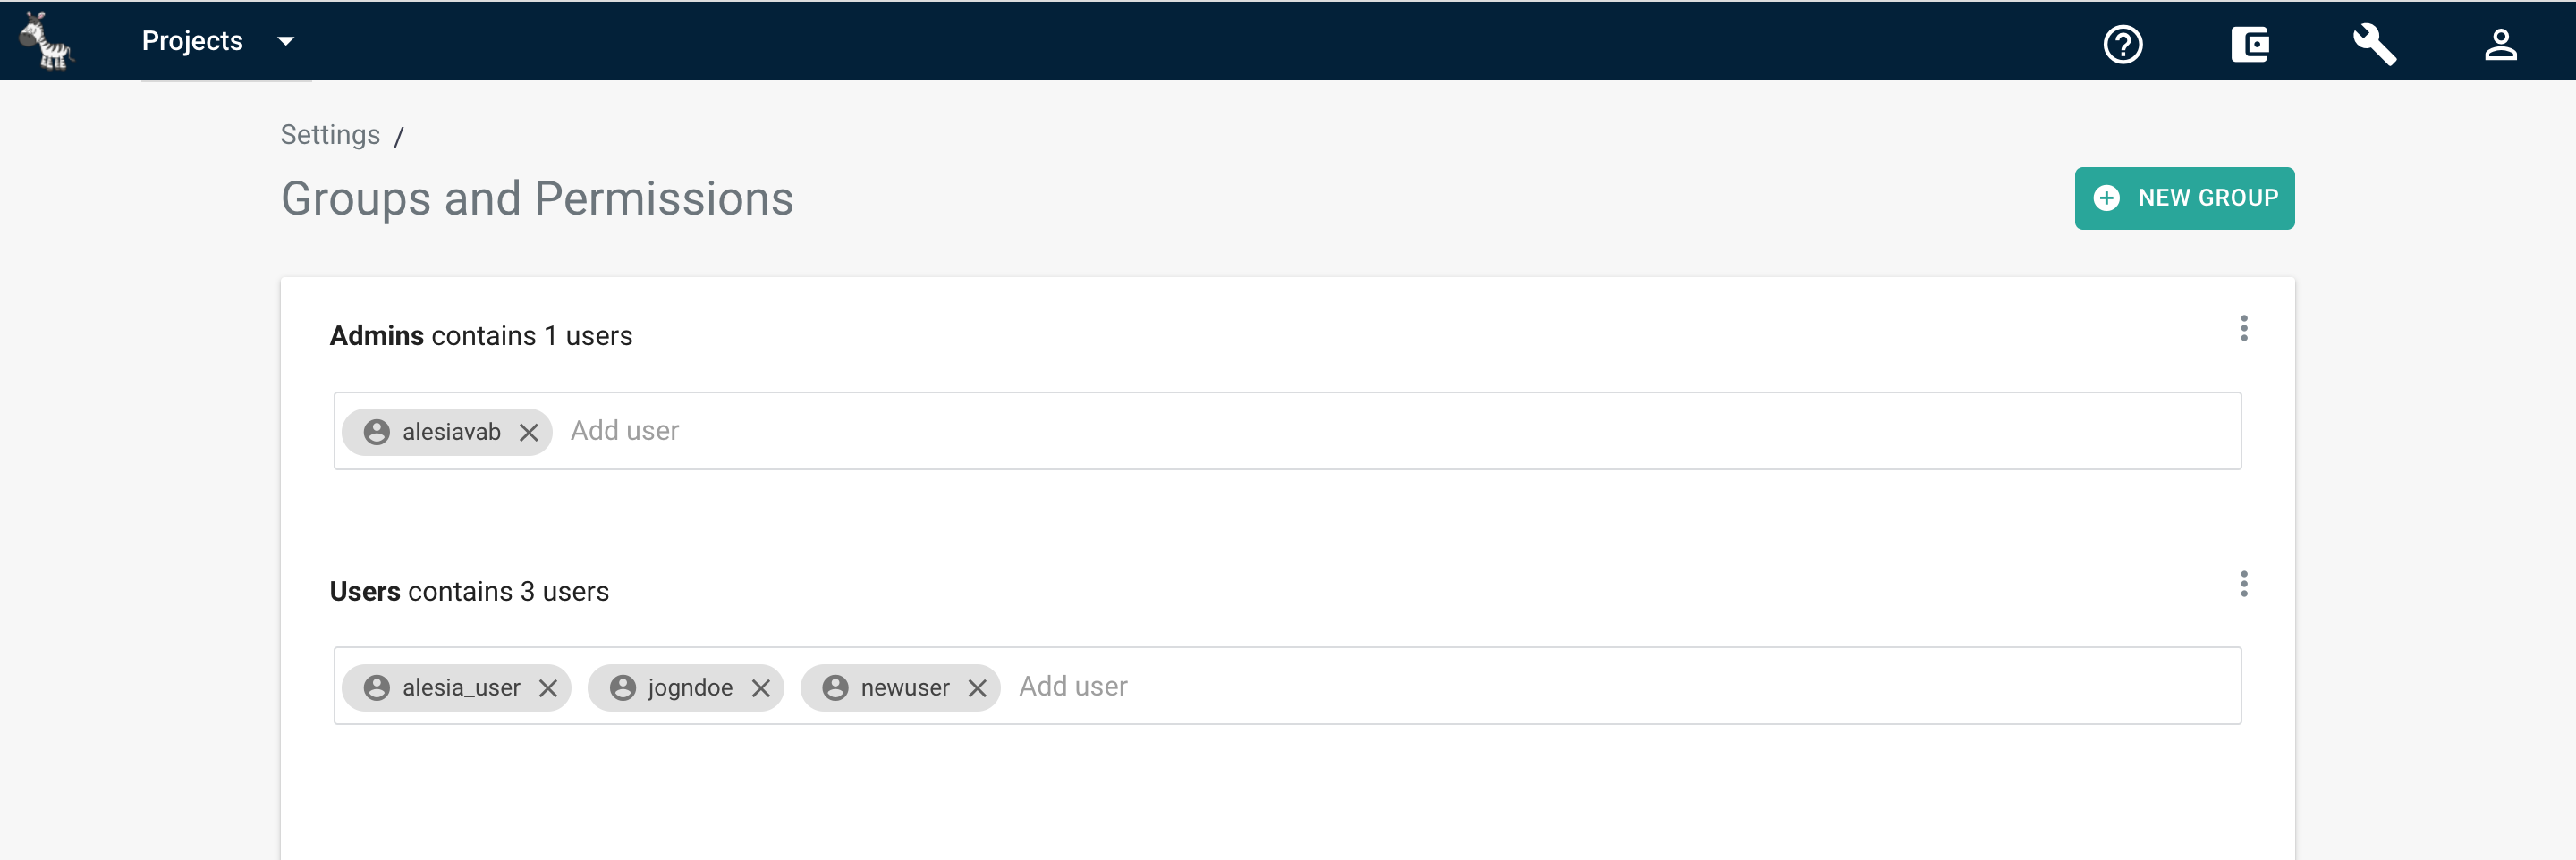
Updating users a in group#
To change the group your workspace users belong, perform the following steps:
- Access the Groups and Permissions grid from the Settings page
- Go to the needed groups: Admins or Users
- If you want to add a user to the group: start entering their username, select the needed user from the drop-down list
- If you'd like to remove a user from the group: find the needed user, click the beside their name

Info
One user may be present is several groups at the same time. Together with that, a user in the workspace may not belong to any group
Changing group permissions#
By default, Zebrunner workspace Admins and Users have a predefined set of permissions. Still, they can be changed.
For this, perform the following steps:
- Access the Groups and Permissions grid from the Settings page
- Click More Options above the needed group
- Click Edit
- Change the group name if needed
- By using the checkmarks, select or unselect the permissions you'd like to set or unset for the chosen group
- Click Update

Creating a user group#
To create a new user group with a custom set of permissions, perform the following steps:
- Access the Groups and Permissions grid from the Settings page
- Click New group
- Provide the user group name
- By using the checkmarks, select the permissions you'd like to set for a new group
- Click Create
Deleting a user group#
To delete a user group, perform the following steps:
- Access the Groups and Permissions grid from the Settings page
- Click More Options above the needed group
- Click Delete and confirm the action
